

AmCham Australia — Membership Team

Onboarding progress
Your sessions
How a Membership Record Works

ENB_PAL_MEM-03 Understanding Contact Types
ENB_PAL_MEM-06 Financial tab
ENB_PAL_MEM-10 Organisation profiles

001-07 Understanding Linked Fields
00:00:06:31 - 00:00:31:18
Here's a riddle for you. What links one field to another and displays its data in your new field, a linked field. Today we're exploring Linked Fields, a powerful feature that connects your data seamlessly across SwiftFox. Let's see how this helps in the real world. Imagine managing a national organisation with branches and sub-branches, each with their own members.
00:00:31:22 - 00:00:59:11
When viewing a member's profile, you'll have a custom field showing their sub-branch. That's helpful, but what if you wanted to quickly see the details about that sub-branch, like which parent branch it belongs to, its location or who to contact. That's where the linked fields shine. Linked fields automatically pull this information from connected profiles, saving you time and ensuring that your data stays consistent.
00:00:59:15 - 00:01:21:09
No manual updates needed. Still a bit puzzled? I got you. Let's walk through a practical example. First, let's head to the custom fields and find my member section. I have a custom field for the sub-branch, but I want to also quickly see who manages a particular sub-branch. When looking at a member's profile, here's how to set that up.
00:01:21:21 - 00:01:48:15
Select manage to enter edit mode. Then add a new field and we want a linked field. We'll name it Sub-branch Manager and connect it to pull information from the Branch Manager field of the members Sub-branch. Simply select Member > Sub-Branch as your source and Branch details > Branch manager as your target. Select create and then done. Look at that!
00:01:48:19 - 00:02:15:00
The field will now automatically display relevant branch manager. The best part is because this is dynamic. As members change branches, the manager information updates automatically to stay current. And if you view a member's profile from a different sub branch, then manager will be displayed. Quick tip. Linked fields need to connect to a source, which is either people or organisation records, not both.
00:02:15:04 - 00:02:33:03
Also, they can't be multi-select fields. This keeps your data clean and reliable. And that wraps up our look at linked fields in SwiftFox. Remember, linked fields are your shortcut to connecting data seamlessly across your system. Linked fields helps you work smarter, not harder.

001-05 Manage custom fields
00:00:04:13 - 00:00:22:40
Custom fields are where your profile data comes to life. We've streamlined how you set them up instead of adding fields on each profile. You can now create and manage them centrally in settings. It's cleaner, consistent, and far easier to maintain across your people and organisation profiles.
00:00:22:44 - 00:00:37:19
In this lesson, we'll show you how to create sections for profile, custom fields and settings. Add fields to people and organisation profiles. Put your new fields to work in List Builder. Let's dive in.
00:00:37:23 - 00:00:54:48
Before we start, you'll need to have permissions to create and manage custom fields. This is typically an admin role, so you may need to speak to your administrator. Decide which profiles this information belongs on. People, organisations, or both. Take the time to plan your sections first.
00:00:55:02 - 00:01:12:09
Clear sections make life easier as your library grows. Open settings and select custom fields under System Management. Choose the profiles area you want to manage. People or organisations.
00:01:12:13 - 00:01:23:49
Select add new section. Name this section, keep names clear and functional, such as membership, engagement, finance or compliance. Create, your empty section is ready.
00:01:24:03 - 00:01:33:44
Here's a tip. Sections. Keep fields tidy on the profile and make settings maintenance easy. If you expect repeating rows, consider a data table section instead.
00:01:33:48 - 00:01:47:20
Now we won't cover those here, we have a dedicated lesson for that and it's well worth a watch. The host is phenomenal and the content is pretty good too.
00:01:47:24 - 00:02:15:41
Now let's set up some fields. Choose a field type and name it. Popular options are date, for key dates like join, date or renewal date. File upload for documents. Number for fees, counts or scores. Select or multi-select for statuses and categories. Smart URL for tidy clickable links. Text for notes you want searchable. Configure any type specific options, then select create.
00:02:15:45 - 00:02:29:02
Similarly to sections, you can also configure permissions for individual fields, giving you complete control over your data and how you can edit it.
00:02:29:06 - 00:02:50:05
All profile custom fields appear as filters in List Builder, allowing you to build dynamic segments like members with renewals due within 30 days. Organisations tagged as partners with active status. People with certifications at level three in the past year. For more on this, check out our List Builder course.
00:02:50:09 - 00:02:57:28
That's it for custom fields. You've now got the tools to keep your profiles organised, your data discoverable, and your lists sharp.
Applications & Approvals

016-04 Creating a membership or subscription form
00:00:05:00 - 00:00:26:10
Today we're going to walk you through how to create a new subscription form. These forms are typically used to sign up new members, put your donors on a recurring plan, or to sell a subscription to a service you offer. To understand how to create a form, check out our comprehensive video on creating a new form in a SwiftFox Academy.
00:00:26:14 - 00:00:49:18
If you already know how to create a form, let us show you now how to start taking subscriptions. First, let's head over to our form section and bring up a form we prepared earlier. Now let's drag in an add or update contact blog so we can capture the details of the person making the payment. The next step is setting up your subscription or membership plans.
00:00:49:22 - 00:01:16:01
To do this, drag in the subscription block to the canvas and then edit the settings on the right hand side. Select the plans you want the form to display by using the dropdown. You can select one or multiple. You can also set the subscription to automatically renew by selecting the default to auto renew checkbox, or you can give the prospect the option to choose auto renew for themselves.
00:01:16:05 - 00:01:39:45
Finally, you can also override the default labels SwiftFox has set to tailor the form to your organisation. Now, your subscription on your form is all set up. The final step is to set the payment method you wish to provide. To do this, drag the payment method block to the canvas and now on the right hand side, select the payment options you will provide on the form.
00:01:39:49 - 00:02:12:11
The options in this dropdown will be the payment methods you have previously set up in SwiftFox and connect to your payment gateway. Now all that's left is to add your submit button underneath your payment block and you are ready to go. If you are unclear about your payment methods, just get in touch with our team. We understand setting up payment forms can sometimes be a little nerve wracking given it's dealing with revenue, so our team typically helps you set up all your initial payment forms when you get started with SwiftFox, and we then provide detailed training.
00:02:12:15 - 00:02:21:06
I hope this video has served as a refresher, and if at any time you need extra assistance, be sure to contact our team directly. We'd be more than happy to help.

010-03 Understanding Form Questions
00:00:06:01 - 00:00:23:05
This lesson is all about questions or specifically the different question blocks in our form builder. We'll cover contact, contacts, text question, form responses. Let's dive in.
00:00:23:09 - 00:00:43:35
So here I am in the form builder. Let's see what we have here. This here is the add/update contact. And it's pretty smart, even if we do say so ourselves. This block means that if a person or organization is not already in your SwiftFox contacts, a new profile will be created once they fill in their details.
00:00:43:43 - 00:01:09:47
And if there is already a profile for them, any new information recorded will flow through to their profile automatically. Let's put this contact capture block to work. On the left side we can see properties and on the right side fields. Let's go into fields. Now fields are short for custom fields. It's how to cool people say data points that your organization is tracking from your contacts.
00:01:10:01 - 00:01:40:25
For example, we might record people's mobiles organisation, name their role in the organization or diet trace. Now these custom fields are the ones that we have set up but you can create really tailored fields for your organization. So check out our Custom Fields video if you would like some more examples. So I've gone ahead and added all these fields to my add update contact block
00:01:40:29 - 00:02:04:37
Wait, did already do this one? No we didn't. This one is all about the S. So what is Add/Update Contacts block? This is so you can record multiple people's contact details. When do you need to use it? For example, if you are creating an event form, you might ask your guests if they would like to invite a friend or other people from their organization.
00:02:04:41 - 00:02:35:17
So when this block multiple peoples, organizations and people s can be created. And of course, any additional information you learn about your existing contacts will flow through to three folks. Let's go ahead and add the update contacts block. Same as before, I'll add my fields mobiles, organization name. Go to properties, now what is this limit option? This is so you can limit the amount of new contacts recorded.
00:02:35:21 - 00:02:55:00
Why would I want that? So if this was an event form, you might want to create a limit on the number of guests someone can add to your event. And select this box if you would like to create a separate organization profile. Great. Now select done.
00:02:55:04 - 00:03:13:15
Let's move on to the text question type. The text question type allows you to create a single question with a single written answer. Drag the question block onto the canvas and use this dropdown menu to choose your question type. Select text.
00:03:13:19 - 00:03:23:40
Write your question, ‘What is the most memorable thing that happened to you this week?”. And then choose whether your question is required of people filling in your form.
00:03:23:44 - 00:03:29:14
Click done! And that's it.
00:03:29:18 - 00:03:53:32
Where can I see my form responses? Forms stores data for you instantly in useful places. There are three places that form answers live in SwiftFox. Let's take a journey to find them all. The first is in posts in the global feed. Each time someone fills out a form, it will appear here as a post. Click the form title to reveal that person's answers.
00:03:53:36 - 00:04:21:00
The second is on a person's profile. Navigate to a person's profile. Click on the name in the global feed or search for the name of the person in the Swift search. Click posts. Here you will find a list of the forms this person has filled out and clicking the form title will display their answers. Answers filled out using the Add/Update contact block will appear in the fields in those relevant tabs.
00:04:21:04 - 00:04:29:24
And there you have it. What a lot of beautiful ways to record questions and answers. To check out our other form videos, click the link below.

010-05 Conditional logic on forms
00:00:05:24 - 00:00:34:33
Welcome to our tutorial on conditional questions in SwiftFox. This powerful tool allows you to create dynamic forms that adapt based on your user's responses, making their experience smoother and more personalised. In this session, we will walk you through setting up a conditional question that changes depending on the answer to a previous question. Creating a more intuitive form flow. So let’s dive in with a real world example.
00:00:34:37 - 00:00:56:07
First, let's start with a blank canvas. Drag in a question block to begin crafting your form. For our tutorial, we'll create a two part question about favourite international destinations. We'll first ask users to choose their favourite country from a list of five. Then inquire about their preferred city within that country.
00:00:56:11 - 00:01:28:42
Our initial question offers these options Australia, France, Great Britain, USA and Italy. Now let's set up our second question to discover their favourite city. For those who selected Australia, we'll create another question block with six Australian cities Melbourne, Sydney, Brisbane, Perth, Adelaide or Cairns. Here's where the magic happens. We only want this block to appear if the user chose Australia to the first question.
00:01:28:46 - 00:01:56:32
To achieve this, click on the conditional settings in the question menu and select Add Condition. In the Conditional Question dropdown, choose our first question. What is your favourite country? Then under required answer, select Australia. This set up ensures that our second question block will only appear if the user picked Australia in the first question. Brilliant. Our condition is now in place.
00:01:56:42 - 00:02:26:29
Let's add one more group of cities, this time for the USA. To save time, we can clone question two and modify the details. Let's add some American cities New York, Los Angeles, San Francisco, Boston and Houston. For this set of options to appear, we'll create a new condition where the answer to question one needs to be USA. Now let's preview our form with these conditions in place.
00:02:26:33 - 00:02:52:43
Click on the Preview and Publish button. You'll notice we only see our first question. What is your favourite country? If you select Australia, the Australian cities will appear. Choose USA and you'll see the American cities instead. And there you have it. You've just learned how to set up conditional questions in SwiftFox. This feature allows you to create more tailored and engaging forms for your users.
00:02:52:47 - 00:03:10:17
Remember, this functionality isn't limited to just questions. It also works with other form blocks, including payment and subscription blocks for those using SwiftFox’s finance features. Thanks for joining us today, and don't forget to check out our other tutorials for more SwiftFox tips and tricks.

010-04 Find Form Responses
00:00:05:26 - 00:00:20:21
You have a form out in the world, and now you want to see the results. Let's find some answers. Forms store data for you instantly in useful places. There are three places that form answers live in SwiftFox. Let's take a journey to find them all.
00:00:20:30 - 00:00:28:21
The first is as posts in the global feed. Each time someone fills out a form, it will appear here as a post.
00:00:28:25 - 00:00:49:33
Click the form title to reveal that person's answers. You can also hide results from the global feed if you have too many respondents. The second is on a person's profile. Navigate to a person's profile. Click on name in the Global Feed or search for the name of a person in Swift Search. Click "Posts."
00:00:49:37 - 00:00:56:38
Here you will find a list of the forms this person has filled out, and clicking the form title will display their answers.
00:00:56:42 - 00:01:19:31
Answers filled out using the Add Update contact block will appear in fields in the relevant tabs. Finally, for an overview of the responses your form has received, go to Forms. Click on the form you're interested in. Click "Next" to progress to the publish page and click this tab up top that says "Report." Visualisations of all responses will appear.
00:01:19:35 - 00:01:32:20
If you would like to export your form answers to an Excel file, you can do so from the Forms page. Click this three-button icon. To see more tutorials on SwiftFox, click the links below. Enjoy!

026-01 Create an action centre
00:00:05:09 - 00:00:15:42
Action Centres are your command hubs in SwiftFox. Think of them as smart tables that help you track activity, spot data issues, and take action. All in one place.
00:00:16:03 - 00:00:30:14
Whether you're monitoring new member approvals, tracking failed payments or reviewing form submissions, action centres give you live reports with easy tools to fix, follow up, or review information directly from the action centre.
00:00:30:18 - 00:00:43:27
In this lesson, we'll show you how to create and customise your own action centres using the new action centre creator in system management settings.
00:00:43:31 - 00:00:54:21
To access the action centre creator, navigate to system management in Settings. If you can't see this option, you'll need to contact your administrator to enable this for you.
00:00:54:25 - 00:01:08:26
Once you're in, you'll see all your actions in two areas at the top. These are collections of action centres that are easily accessible from the side feature menu. Action centre is the default area which will always be visible.
00:01:08:30 - 00:01:21:17
Bit of a side note here. If you just love Action centres and you want your favourite one to be really easy to find across your organisation, you can also go to the feature menu settings and rearrange these as you like.
00:01:21:21 - 00:01:31:16
Below the areas you'll find sections which contain all your action centres. From here you can edit move to a different area or archive an Action centre.
00:01:31:20 - 00:01:42:09
Archiving is brilliant. It hides the action centre from view but keeps it manageable here in settings for later on.
00:01:42:13 - 00:02:03:41
I want my new action centres to be easily accessible by everyone. So let's start by creating a new area. You can do this by selecting Create New and select New Action Center area. Add your area details. Select an icon and set the path name. The path name must contain no spaces as it appears in your URL.
00:02:03:45 - 00:02:14:34
Important note. After creating a new area, you'll need to refresh your page to see it in the feature menu.
00:02:14:37 - 00:02:23:19
Now for the exciting part of creating your Action Centre. Select Create New, then Action Center and you'll see several options.
00:02:23:23 - 00:02:31:09
For this example, we're going to create an Action Center to display all our members that are due for renewal in the next 30 days.
00:02:31:13 - 00:02:42:42
So we will call this upcoming renewals. Select an icon. We'll add this to the area we already have for membership and create a new section called renewals.
00:02:42:46 - 00:02:58:40
Select the Action Centre type such as cases, financials, forms and many more. In this case we'll pick List Builder. We can then pick the list that I have pre-prepared, which contains all members that have a renewal coming up in the next 30 days.
00:02:58:44 - 00:03:06:48
For action centres that you want to appear in your website or portal, you can enable this here and configure additional settings.
00:03:07:02 - 00:03:13:06
For List Builder Action centres, you can configure additional settings for the columns in your table.
00:03:13:10 - 00:03:35:10
Default fields are already set, but you can add or remove any field to change which columns display. You can leave the labels as they are or customise them. Finally, if you want certain details such as member status to be directly editable in the Action Center, you can enable that here too.
00:03:35:14 - 00:03:58:13
After configuring your Action Center, you’ll set permissions. You can make it viewable by everyone, editable by specific people, or completely view only. If someone doesn't have edit permission, they won't be able to access the settings drawer to modify the action centre. I will leave this as it is for now, so let's select save.
00:03:58:17 - 00:04:07:01
If we go over to our action centre area in the feature menu, we'll now see our new section, and the action centre exactly as we configured it.
00:04:07:05 - 00:04:26:21
And that's how you create and manage action centres in SwiftFox. With these tools you can build custom action centres that help you track, monitor and take action on exactly what matters to your organisation. Thanks for watching. If you'd like to explore more SwiftFox features, check out our other Academy lessons.
Subscriptions, Renewals & Invoicing

016-02 Create & edit subscriptions
00:00:04:46 - 00:00:31:16
Subscriptions are an important revenue stream for many organisations. Whether you have members, donors, customers, or clients. Subscriptions in SwiftFox are used to track how much money your contact should pay, how often they should pay, what payment method they pay with, and the benefits of the subscription. In this lesson, we'll explain how to create new subscriptions or edit existing ones.
00:00:31:20 - 00:01:00:18
To get started, let's bring up a user's profile. Here you will see the financial tab. This tab will only be displayed if you have the SwiftFox Finance feature. Scroll down to that Subscriptions table. Here you will see the full subscription history of your contact. To add a new subscription, select Create Subscription. In the draw select the plan you want to add to your contact, then select proceed.
00:01:00:22 - 00:01:26:25
You can now select the options for the plan, including when to start the subscription, whether you want the subscription to automatically renew, how frequently payments are made, and what payment method you use for this subscription. Here you can also add bank account details for direct debit or credit card details for card payments. Once you have made your selection, click proceed.
00:01:26:29 - 00:01:50:13
The final step is confirming all your details and selecting confirm. Now you can see your active subscription for your contact in the subscriptions table. You can change your subscription level for your contact at any time. To do this, select the name of an active subscription to view the details. Here you can choose to change, pause, or cancel their subscription.
00:01:50:17 - 00:02:20:00
To pause the subscription, select pause and pick a reason from the provided options. Then select Hold to cancel a subscription. Select cancel and confirm your choice. Now you can see your subscription has been canceled. So there you have it. You now understand how to add or edit a subscription on the contact profile. Be sure to check out our other videos in the finance course to get right across all the finance features SwiftFox has to offer.

016-18 Create financial plans and subscriptions
00:00:04:16 - 00:00:20:29
Today we're learning how to set up financial categories, plans, plan fees and plan add-ons in SwiftFox. By the end, you'll be able to create a plan that's ready for subscriptions, with future price changes and optional discounts or surcharges.
00:00:20:33 - 00:00:37:10
Today, we'll cover how to create financial categories to organize your plans, setting up plans with anniversary or common renewal types, adding and managing plan fees, including future price changes and applying plans to customer profiles.
00:00:37:14 - 00:00:49:04
You'll find Plans under Financial in Settings. Here is where you can create and manage financial plans and subscriptions.
00:00:49:08 - 00:01:21:48
All plans need to belong to a category, so it's a good idea to set these up at the start. If you don't already have any setup, select Add Category. This will open the Manage Category drawer where you can create and edit these. We’ll select Add Category. Give your category a clear name such as “membership”. Leave multi Active subscriptions unchecked unless you want people to hold multiple plans in the same category. Select Save.
00:01:22:02 - 00:01:33:02
Now we can set up our plans. Click Add Plan to begin configuring your new plan. Give your plan a clear name such as “Full Rate” to help identify it later.
00:01:33:06 - 00:01:46:43
Next, choose a plan type based on how you want renewals to work. An anniversary plan renews on each customer's individual plan start date, while a common plan renews on a shared schedule for all customers.
00:01:46:47 - 00:01:55:31
For example, if your membership aligns with the financial year, you would select common and set the Common Period date as the 1st of July.
00:01:55:35 - 00:02:09:33
The plan category will default to the one you had selected, but you can also create a new category on the fly if needed. If you've already created planned add ons such as surcharges or discounts, you can add these here.
00:02:09:37 - 00:02:16:27
If not, don't worry, we have a dedicated lesson that covers these in detail and they can be added later.
00:02:16:31 - 00:02:35:19
Next you'll see line type for example; subscription and tracking codes. If you use these for your invoicing, we won't cover tracking codes in detail here as we have a dedicated lesson on this topic. If you accept nominated amounts from customers enable the Allow Custom Payment option.
00:02:35:23 - 00:02:56:08
It is important to note that you can edit a plan until subscriptions exist. However, once people are subscribed, the plan settings are locked to preserve billing history. Once you're satisfied with your settings, select save. You'll be prompted to add fees to activate the plan.
00:02:56:12 - 00:03:23:08
Fees define the price interval, currency, and timing for each plan. Select Add Fee to set up a new fee. Select your plan interval such as monthly or weekly and specifying the number of intervals between each bill. In most cases, the standard interval will meet your needs, but if you have a unique billing cycle, such as every four weeks, you can set the interval to weekly and the number of intervals to four.
00:03:23:12 - 00:03:41:20
Set the effective date to determine when this fee becomes available. Choose a currency if you need it to be different from your default. Now you can set the actual fee amount. For example $210. This means someone on this fee will be charged $210 every four weeks.
00:03:41:24 - 00:03:51:08
The final options here are optional and allow you to configure invoicing settings, specify whether the fee is tax inclusive, or adjust payment timing.
00:03:51:12 - 00:04:22:27
You can also override the plans period for this specific fee. For example, a common plan fee can be set to behave as an anniversary fee. Select save to complete the process. Now you can repeat this process to add multiple fees for different intervals and future changes. For example, add a weekly fee of $50 effective this year at a monthly fee of $200. Effective this year. Add a future weekly fee of $60, effective 1st of January next year.
00:04:22:31 - 00:04:41:01
All of these fees will appear organised by Status. Active, the most recent fee, whose effective date is in the past or today. Future, fees will start later, which are perfect for scheduled price rises and Expired, older fees that have been superseded by a newer effective date.
00:04:41:05 - 00:05:04:13
It's important to note that you cannot completely delete a fee, as people may already have an active plan using any of these fees. Instead, you can archive a fee to hide it from subscription options so that no new plans can be activated under that fee. At any time you can unarchive It to make it available again.
00:05:04:17 - 00:05:40:24
Let's now go to a person profile and see these plan options in action. Open a person's profile and head to the financial tab under subscriptions, select Create Subscription. You will see the plans you have added. Select one and then select proceed. The available intervals mirror the plans active non archived fees. If you can't see an interval, you expect to check whether that fee is archived or its effective date isn't current yet. Select the relevant payment option. Proceed and confirm. The subscription will now show in the table.
00:05:40:28 - 00:06:00:33
Congratulations! You've successfully set up and applied your own financial plans. You're unstoppable! You can now create categories, build plans with flexible fees, schedule future price changes, and manage subscriptions with confidence. To continue exploring SwiftFox's financial features, check out the rest of the course.

016-19 Create plan surcharges and discounts
00:00:04:05 - 00:00:19:27
Previously, we built financial plans and subscriptions from the ground up. Now it's time to add some pricing flexibility to the mix with discounts and surcharges. Because who doesn't love a good discount? Or at least the option to add a processing fee when needed.
00:00:19:31 - 00:00:35:01
Plan add-ons live in a dedicated section within your financial settings. To access them go to Settings, then under Financial select Plan add-ons.This is where you find all your add-ons to manage or create new ones.
00:00:35:05 - 00:00:52:19
Add-ons are discounts and surcharges, but are universal and can be applied to any or all plans. When assigned to a plan they aren't automatically applied, but rather become available to select when applying a plan and fee.
00:00:52:23 - 00:01:18:08
Let's start with discounts. To create a discount, select Add Item, then choose Discount. Name your discount something clear like “Concession”. For the interval, choose which billing cycle it applies to weekly, monthly, or leave it empty to apply to any interval, under add-on type and amount. Select either fixed amount or percentage. In this example, we'll make it a 10% discount.
00:01:18:12 - 00:01:43:40
You can set optional limits such as total units and per subscription limits. Under Link plans, select which plans have access to this discount. You can choose one or multiple plans. Alternatively, you can add the discount to the plan from the plan settings. It works both ways. Finally, select save to create your discount.
00:01:43:44 - 00:02:05:43
Creating surcharges works the same way as discounts, except the amount is added on top of this plan fee rather than subtracted, and optionally set the same interval, restrictions and limits. Link eligible plans as you would for discounts, then save. You can also link add-ons directly from a plan's edit draw under the Discounts and Surcharges section.
00:02:05:47 - 00:02:17:06
And that's it. You've just added some serious pricing flexibility to your plans. Be sure to check out the rest of the course to keep exploring SwiftFox’s financial features. There's plenty more to discover.

016-11 Invoices as a payment option on Forms
00:00:04:47 - 00:00:26:14
In this tutorial, we're going to show you how to set invoice as a payment option for your event tickets. This feature adds flexibility to your ticket purchases, especially for those organisations that need this option. Today, we'll walk you through the process of setting up invoice as a payment option for your event tickets. It's a game changer for event management.
00:00:26:18 - 00:00:51:03
If you're new to creating paid events, check out our Create Ticketed Events tutorial in the Swift Fox Academy. It's a great starting point. All right, let's get started. First, we'll head into the ticket step of our event. I have gotten the start here and already set up a few ticket categories. Now let's add a ticket. Scroll down until you see the financial Ticket Settings dropdown.
00:00:51:10 - 00:01:19:07
Now this is where the magic happens. In this section you can set the item code account and tax rate for your event ticket. And remember, each ticket can have its own unique codes. Pretty neat right? Next up we're heading to the RSVP page step. This is where we'll add invoice as a payment option. Since this is a ticketed event, we need to add the ticket block to our form.
00:01:19:11 - 00:01:41:16
Don't forget to select the tickets you want to make available because it's all about choices. Now for the crucial part. Adding a payment block in the payment settings you'll find invoicing. Now in here we'll select allow invoice as a payment method. It's that simple to open up a new payment avenue. Here's where you can get into the details.
00:01:41:20 - 00:02:09:20
Enter your invoice reference. Select the due date and if you're using any invoice providers like Xero, you can select those integrations here. SwiftFox does play well with others, and here's a pro-tip some users might want ticket purchases to set their own reference number, like a purchase order number. You can enable this by clicking this dropdown. It allows users to enter a number or code that will appear on the invoice.
00:02:09:23 - 00:02:16:47
Talk about customisation. Great job! You're all set to sell tickets via invoice using SwiftFox. Thanks for watching.
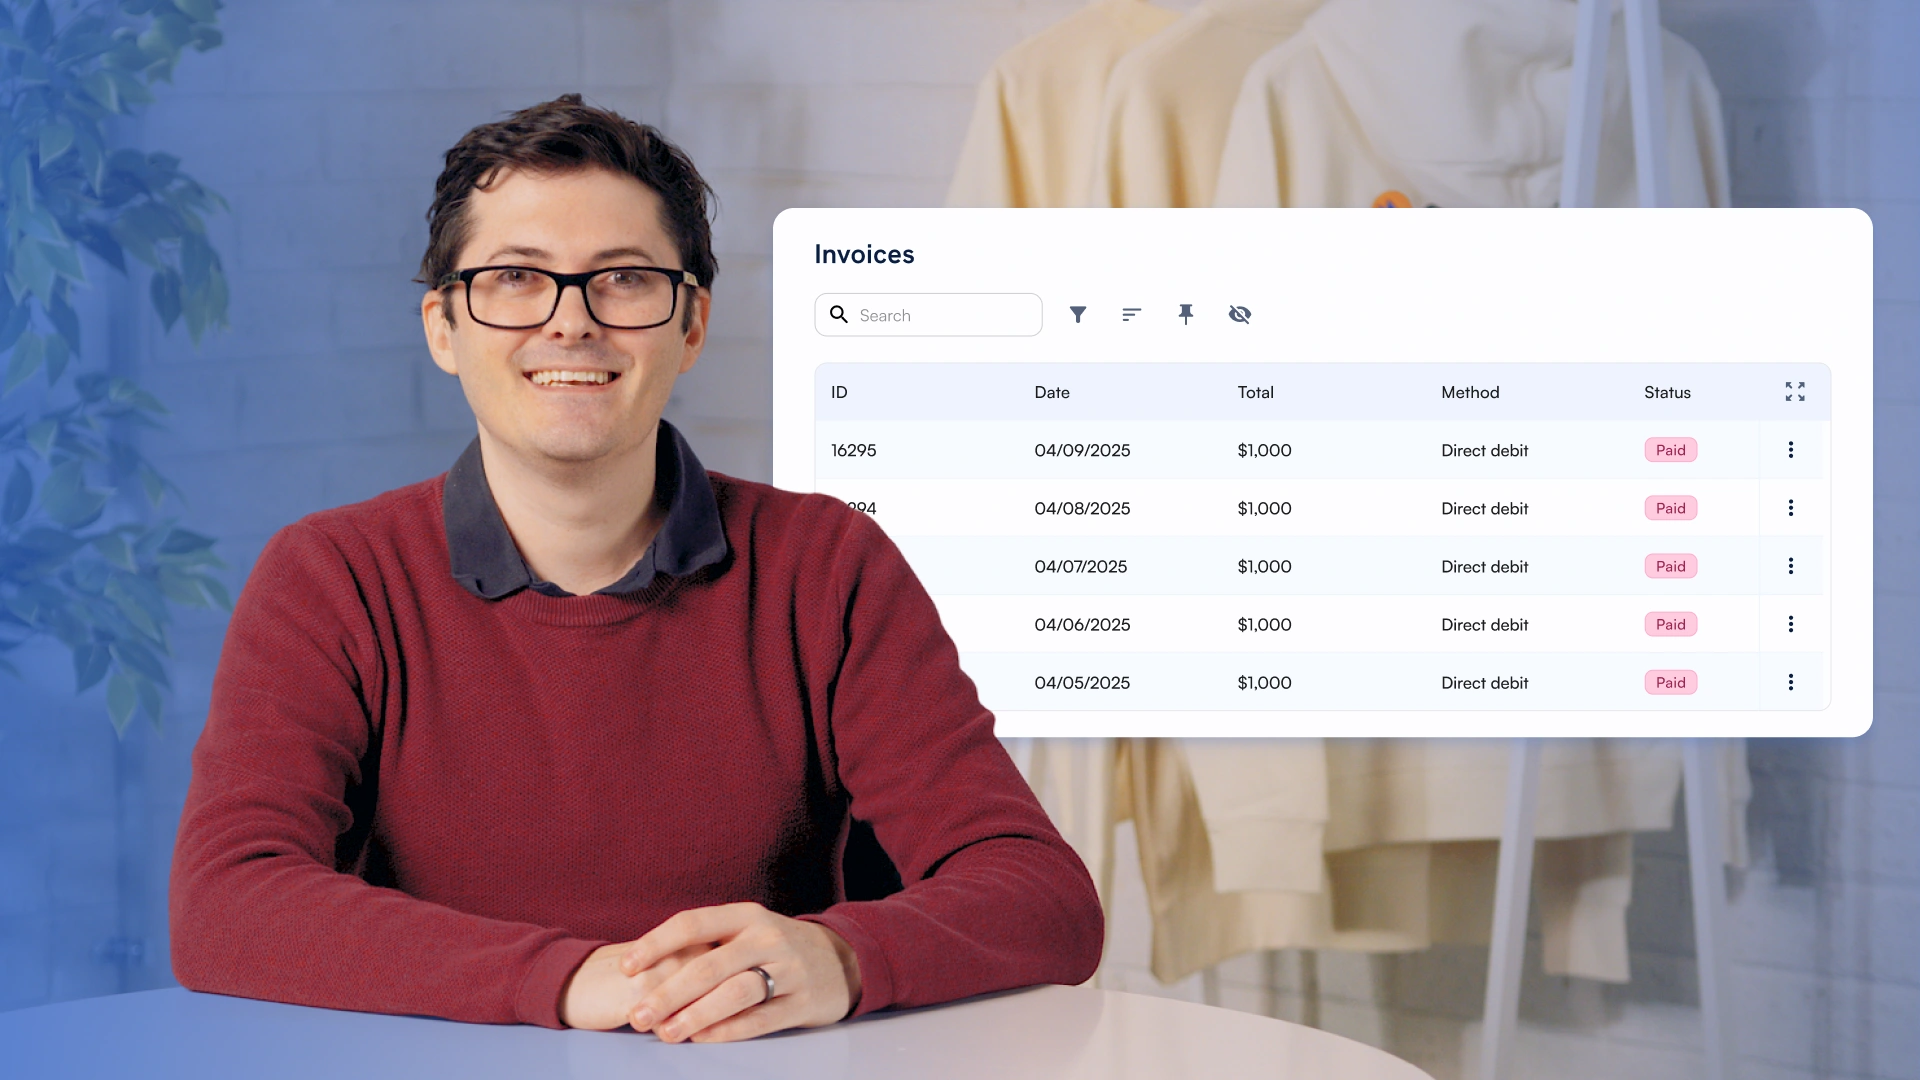
Masterclass: Invoices
00:00:04:06 - 00:00:17:17
Hey everyone, welcome back to another SwiftFox Masterclass. Today I'll be walking you through some significant improvements to how SwiftFox handles, invoicing, subscriptions and financial management. And there's a lot to be excited about here.
00:00:17:21 - 00:00:28:42
These changes are designed to give you more flexibility and control over your billing, whether you're managing memberships, donations, or any kind of recurring payments through SwiftFox. Let's get into it.
00:00:28:46 - 00:00:49:31
Here's the challenge a lot of our customers face. Your membership base doesn't all join on the same day. People sign up throughout the year. They upgrade their plan, they move between tiers, they go on hold, they come off hold and keeping billing clean, fair and transparent across all of that has traditionally required a lot of manual work or a lot of compromise.
00:00:49:35 - 00:01:15:41
These latest changes to SwiftFox handle all of that complexity for you automatically. The big change here is how invoicing works in subscriptions. It's been completely revamped. Invoices now generate automatically for every subscription. Clearly outlining exactly what has been paid and what is due. These invoices contain line items with clear descriptions of the billing period. They cover quantities, unit prices, and totals.
00:01:15:45 - 00:01:39:33
When you sign up a new member or customer and add them to a subscription and invoices created automatically. For common period plans, this invoice represents the entire year and will slowly be paid off over time using their fortnightly, monthly and quarterly payments. For anniversary plans, one invoice will be generated for each period, be that weekly, fortnightly, quarterly or anything in between.
00:01:39:37 - 00:01:53:17
In all of these circumstances, you have full control over whether these invoices are emailed out to your members and customers. For those customers with a member portal, you even have the option of showing these invoices there for your customers to see anytime.
00:01:53:21 - 00:02:05:01
This invoice first model offers flexibility and oversight. When a subscription changes, say, and then the upgrades that apply mid-cycle, the system automatically handles the proration for you.
00:02:05:05 - 00:02:18:27
You'll see a clear credit and charge line item on the invoice for both you and the member to know exactly how the adjustment was calculated. It's completely transparent, and it builds trust with your members because they can see the numbers add up.
00:02:18:31 - 00:02:34:03
Your invoices also generate professional PDF tax invoices customisable with your organisation's details and branding. They can be set up for early invoice generation, so invoices go out ahead of billing date and your members always know what's coming.
00:02:34:07 - 00:02:57:18
Invoices status are cleared to paid, partially paid, and approved and awaiting payment. So you always know where things stand. These changes represent a long awaited step forward for financial management in SwiftFox. Whether you're running simple annual memberships or complex, multi-tiered subscription models with members joining and changing plans throughout the year, the platform now has the flexibility to handle it.
00:02:57:22 - 00:03:10:10
If you have any questions about these changes or want help getting your plans configured, reach out to a member of our support team through the support button in SwiftFox, or talk to your account manager directly. Thanks for joining us and we'll see you next time.

013-03 Custom field based automations
00:00:05:17 - 00:00:19:49
Custom fields are one of the most powerful features in SwiftFox, allowing you to report on, track and manage your contacts, exactly how you need. Let's explore how automations can make these custom fields work even harder for you.
00:00:19:49 - 00:00:37:44
In this tutorial, we'll look at two game changing ways. Automations can help you manage custom fields. Using a custom field change to trigger an automation. Updating custom fields automatically based on other actions. Let's dive into our first example.
00:00:37:44 - 00:00:45:14
I want to create an automation to send automatic confirmation emails when my members renew date changes.
00:00:45:14 - 00:00:57:34
First, let's create a new automation called Membership renewal confirmation. Select Trigger Automation and choose one or more custom fields changed.
00:00:57:34 - 00:01:05:02
Now we'll tell Swift Fox which custom field to watch. We want this to run when the membership renewal date changes.
00:01:05:07 - 00:01:35:22
So select the person record type and then Membership Renewal Date. You can choose to run this for any change or set specific values to look out for. Select add trigger. Next, we set up what we want to happen after the change. Select Add Action and choose an email is sent. Here we will target the email to affected contacts email addresses and have the email come from the membership team.
00:01:35:26 - 00:01:46:10
You can use an existing email template here, but it is important to make sure to check the merge fields are pulling the correct information, as they can be different from regular emails.
00:01:46:10 - 00:01:59:36
To do this will open the email builder and update the merge fields for members name, and then new renewal date. Save and close. Add the action and hit publish.
00:02:00:42 - 00:02:05:44
Now your members will automatically receive confirmation emails about their renewal dates.
00:02:05:44 - 00:02:15:01
I know what you're thinking. Wow. That's incredible. But just wait. There's more. Let's look at how automations can update custom fields for you
00:02:15:01 - 00:02:22:06
Here I have an existing automation that sends an email to a contact after they complete our contact form.
00:02:22:06 - 00:02:29:29
This is really cool, but you might want to automatically update their mailing list custom field so they're added to your weekly newsletter.
00:02:29:29 - 00:02:38:01
Here's how we'll add an additional action by selecting Add an action. By the way, you can add as many actions as you like.
00:02:38:01 - 00:02:51:02
Select a custom field is updated and target it to contacts created or updated by the form. Choose your mailing list custom field. Set it to yes and add the action.
00:02:52:12 - 00:03:12:12
Simple as that. Now everyone who completes your form will be automatically added to your mailing list, saving you time to focus on the more important things like taking longer coffee breaks. These examples just scratch the surface. The possibilities for combining custom fields and automations are endless.
00:03:12:33 - 00:03:22:25
Ready to make your custom field work even harder for you? Then check out our other tutorials to discover more SwiftFox features that will streamline your workflow.
Data Quality & the Member Portal

001-11 Merging Profiles
00:00:04:13 - 00:00:19:48
Hey there, ever had that moment where you realise you've got the same person living two separate lives in your database. Don't worry, we've all been there. Today we're going to look at how to bring those duplicate profiles together using SwiftFox’s Merge Profile tool.
00:00:20:02 - 00:00:36:12
Let me tell you about Sarah from Bridge Lawyers. Last week she attended one of our events and registered with her personal email. The thing is, we already had her in our system with her work email to Sarah's one person. The perfect case for a profile merge.
00:00:36:16 - 00:00:50:44
Start by opening the profile. In Sarah's case, I went with her work profile. Since that's our primary contact method. On the right hand side. Under quick actions, select Merge Profile. This opens a drawer where the magic happens.
00:00:51:03 - 00:01:11:17
Time to find that duplicate. Here's where it gets interesting. Your starting profile automatically becomes the primary profile. In our case, Sarah's work profile. Use the search box to find the duplicate profile. That's the one we'll be merging in. Got them the wrong way round. No stress. Just hit the arrows to swap them.
00:01:11:21 - 00:01:24:05
Remember, the primary profile is your keeper. Like choosing your favourite coffee mug when you've accidentally grabbed two. The duplicate profile is the one that will gracefully bow out after sharing all of its information.
00:01:24:09 - 00:01:36:45
When everything looks spot on, hit confirm merge. The merge will happen behind the scenes, and that's where folks will create a post showing exactly what happened. Perfect for keeping track of profile changes.
00:01:36:49 - 00:01:50:01
SwiftFox will automatically combine everything from both profiles, including financial history, custom field data, addresses, and contact details, tickets, tasks, posts, and more.
00:01:50:05 - 00:02:05:49
And here's the clever bit if both profiles have information in the same field, we will keep the primary profiles data. But if the primary has a blank field that the duplicate can fill, well, that information will slide right in. Like finishing each other's sentences.
00:02:06:03 - 00:02:20:05
And just like that, Sarah’s profiles are now one in the same. Wasn't that satisfying? Like finally matching those stray socks from the laundry? Thanks for joining us for this SwiftFox Academy lesson. Until next time, keep those profiles tidy.

Spotlight: Merge duplicate profiles
00:00:00:04 - 00:00:08:19
Hey, everyone, it's Olivia from SwiftFox. Today we're showcasing one of our most requested and now delivered features - the Profile Merge Tool.
00:00:08:23 - 00:00:17:49
With the new Merge Tool you can now find and merge duplicate contact records without needing to lodge a support request. Let's dive in and show you how it works.
00:00:18:03 - 00:00:22:49
Head to a contact's profile and select the Merge Profile icon from the Quick Actions.
00:00:23:03 - 00:00:36:32
Next, search for the duplicate contact you want to merge with this one. Then choose which contact you want to keep as the primary profile. This is the main record that will remain. When you click merge, the second contact will be merged with the main one.
00:00:36:36 - 00:00:45:33
So what actually happens behind the scenes? All data from the duplicate profile moves into the primary profile and the duplicate profile is permanently deleted.
00:00:45:37 - 00:01:08:49
Here's what gets merged. Primary contact details; If both profiles have primary details, the profile that is sent to primary are kept. Phone numbers, emails, and addresses. Any unique details from the duplicate profile get added to the primary profile. Custom fields; If the primary profile already has a value, it stays the same. If it's empty and the duplicate hasn't value, that value is added.
00:01:09:03 - 00:01:17:10
Other important data including subscriptions, invoices, receipts, posts, and form responses all move across to the main contact.
00:01:17:14 - 00:01:22:45
It's as easy as that. Now you can keep your contact data clean and tidy, all from within SwiftFox.
00:01:22:49 - 00:01:30:10
Ready to give the merge tool a try? Head to save Fox now and start merging. And don't forget our Academy is here for more in-depth feature walkthroughs.

019-01 Manage contact access to the portal
00:00:05:15 - 00:00:18:34
Discover how to manage and customise your member's portal access effectively. With intuitive controls and flexible settings, you can create a secure personalised experience tailored to different user groups.
00:00:18:39 - 00:00:43:07
In this lesson, we'll show you how to; set up and secure login authentication, customise one-time login emails, build and manage access groups to control portal entry and customise page access for different member groups. So ready to make your portal work smarter? Let's dive in.
00:00:43:11 - 00:01:14:01
First things first, let's talk about how members verify their identity. SwiftFox uses a clever two-step process. Users must enter their email address. They provide a second piece of information to confirm it's really them. Once they've entered the correct details, a secure email is sent to them containing a one-time login link. This email ensures that only authorised users can access the portal.
00:01:14:05 - 00:01:40:07
Here's how to set it up in SwiftFox. Head to settings in SwiftFox, select login portal. Look for login access and choose your verification fields. Select a field to identify member and choose the secondary identification field that will be required for access. This can be a standard field such as first name and last name, or a custom field that you've created for your organisation.
00:01:40:11 - 00:02:00:18
Once this is set up, members will need both their email and your chosen verification field to get their login link. Simple but secure just how we like it. This two step process helps keep your portal safe and accessible only to the right people.
00:02:00:22 - 00:02:11:40
Want your login emails to feel a little more to you? SwiftFox lets you personalise every aspect to match your organisation's voice and style. Let's make your login email shine.
00:02:11:44 - 00:02:38:28
Navigate to your login portal's backend. Find the request login link block section. Select it to open your email settings. Here's what you can customise the sender's name. This is the name that appears as the email sender, so you want it to be recognisable, your sender email address, a subject line that catches attention, the email content - Your chance to be welcoming.
00:02:38:32 - 00:03:10:25
Want to add a personal touch? Use merge fields to include details like the user's name. It's these little touches that will make a big difference. Customise your login email link. Select login request settings. Find the login URL link textbox. Add your custom text. Remember to hit submit, save and publish to make it all live. Now your contacts will receive login emails that feel perfectly on brand.
00:03:10:29 - 00:03:32:49
Now that we've sorted login requirements, let's set up who can access what. Access groups are your friend here, they help you control who sees what in your portal. Think about what you might want to do. Let all active members access the main areas. Keep certain sections for specific membership types and give special access to your admin team.
00:03:33:03 - 00:04:05:19
To create an access group. Start by going back to SwiftFox settings and finding the Login Portal section. From there, select Add Login Group. Create a name that clearly describes the group's purpose and specify the criteria that determines which members belong in this group. To set up access for active members, navigate to Category Type and set it to member, which ensures that only current members can log in. Then select Sync Access Control to update everything.
00:04:05:23 - 00:04:39:15
This crucial sync step ensures your portal reflects all your new access roles and Pro-tip; You can create different groups for different needs. For example, you might want a standard member group for general access and executive member group with extra privileges or a staff group for your team. The choice is yours. You can set up any combination of these groups once they're ready. Members who meet the criteria will automatically get the right level of access.
00:04:39:19 - 00:05:02:04
Now for the fun part controlling which groups see what content. For example, you might want to restrict access to your events page. Regular members can still log in to the portal, but only specific groups will be able to see the events page and its details. Here's how to set up page restrictions. Create an access group for those allowed to view restricted content.
00:05:02:08 - 00:05:18:44
Following our example, create a group called Events Access. Set your criteria. This could be anything, but we have a custom field set up for events access. So we can just set this to Yes. Don't forget to sync your access controls.
00:05:18:48 - 00:05:29:14
Set up page restrictions. Go to the back end of your portal and find the Events page. Right click and choose Restrict Public Access.
00:05:29:18 - 00:05:59:01
Pick group based protection and select next. Select the Events Access group which we've just set up, and now only users in this group will be allowed to view the page. Set up your redirect options. Choose a login page where restricted users will be redirected. Select an error page such as not allowed to display if someone tries to access the page without permission. Now your portal will automatically show the right content to the right people. Smart.
00:05:59:05 - 00:08:16:27
Congratulations on setting up your portal access. By managing these settings effectively, you're creating a secure and personalised experience that puts the right content in front of the right people. Your members will appreciate the thoughtful organisation and easy access to their designated areas. This helps keep your portal running smoothly and your members happy. So well done!

019-02 Enable contacts to update their details
00:00:05:18 - 00:00:20:21
Welcome! Let's explore how you can empower your contacts to keep their information up to date in the Login Portal. This handy feature puts your members in control of their details while reducing admin work for your team. So it's a win-win.
00:00:20:29 - 00:00:40:15
In today's lesson, we'll learn how to; enable organisation admins to update company details, set which details your users can edit, and set up custom fields for users to view and manage. Ready? Let's dive in.
00:00:40:19 - 00:01:02:23
First, we'll configure which details members can edit in their portal. Start by heading to your login portal's backend. Select the My Profile section. Look for the Profile Details Block. By default, this block shows personal details from SwiftFox
00:01:02:27 - 00:01:31:42
For contacts linked to organisations, you might want to enable organisation admins to update company information to. In the Profile Details Block. Enable the option to allow contact to update organisation details. This means that contacts linked to an organisation such as company administrators or team leaders can update key business details. Let's save and publish.
00:01:31:46 - 00:01:54:35
Now will set up which specific details your contacts can edit. Here's how to configure what members can update. Head to settings in SwiftFox. Select login portal. Navigate to the my Profile Fields tab. You will see a list of contact details that members can edit in the portal. Each field has an option for you to choose whether the contact can edit it.
00:01:54:39 - 00:02:19:43
The standard fields include; profile details like name and date of birth, address details for updating residential or work addresses, contact details including phone numbers and alternative emails. Simply use the drop down menu under each field to set editing permissions.
00:02:19:47 - 00:02:47:16
Want to let users edit organisation specific fields? Well, you can enable custom fields to custom fields all visible in the portal by default, but you can enable them with these steps in the Profile Fields tab. Scroll to the Custom Fields section. Select Custom Field and choose which fields to display. Select Add Field to Member profile. Choose whether members can edit these fields or view only.
00:02:47:20 - 00:03:09:32
This is perfect for tracking things like member numbers, member status, dietary preferences, emergency contacts, or professional qualifications. Once configured, contacts can update these details directly through the portal. For organisation admins, follow the same process in the Organisation Profile tab to enable editing of company details.
00:03:09:36 - 00:03:27:48
This feature helps keep your database current by empowering contacts to manage their own information. Not only does this improve data accuracy, but it also saves your team valuable administrative time. Plus, it gives your members more control over their details, making everyone's experience better.

019-05 Enable contacts to manage their subscriptions
00:00:05:17 - 00:00:16:15
Let's explore how contacts can manage their subscriptions and plans in the SwiftFox Login Portal. We'll show you how this self-service feature makes life easier for everyone.
00:00:16:18 - 00:00:33:24
When contacts manage their own subscriptions through the portal. Your organisation benefits in several ways. The self-service capabilities significantly reduce administrative workload while giving contacts more control over their payments and subscription details.
00:00:33:28 - 00:00:45:11
Additionally, the system provides better transparency by offering easy access to invoices and receipts, making it simpler for everyone to stay organised. Ready? Let's dive in.
00:00:45:15 - 00:01:07:49
When contacts log in to the portal with an active subscription, they’ll see their my membership page or whatever you've customised this title to be. This handy hub lets them; view their current subscription details, handle their payment methods, access their receipts and invoices, take care of renewals or outstanding payments.
00:01:08:03 - 00:01:34:46
The subscription table gives contacts a clear overview of their subscription, showing what they're subscribed to, the subscription cost, their payment history, any payments they need to catch up on, extra add-ons they might have, auto renewal settings and next renewal date and current subscription status. They can also modify their subscription details through the Edit Details option.
00:01:35:00 - 00:01:55:24
SwiftFox keeps all payment receipts in one convenient place. This includes subscription payments, event tickets and donations, all accessible in one convenient location. Members can check payment details and download PDF receipts for their records. Everything's stored right where they need it.
00:01:55:28 - 00:02:07:48
Contacts can also manage any invoices linked to their profile. For each invoice, contacts can see all the details and pay any outstanding invoices directly through the portal.
00:02:08:01 - 00:02:38:32
This flexibility helps everyone stay on top of their payments. Contacts can also easily manage their payment details in the portal. To update the payment method, add their new card to the system. Once that's done, they can remove the old one. We always make sure there's an active payment method for subscriptions, so contacts need to add a new card before removing an old one. This keeps everything running smoothly without any hiccups.
00:02:38:36 - 00:02:52:17
And there you have it! Contacts can now manage their subscriptions and payments easily in the Login Portal. This self-service approach makes everything more efficient and keeps all your payment records accurate and up to date.