

AmCham Australia — Finance Team

Onboarding progress
Your sessions
Financial Foundations

016-01 Understanding a contact’s financial profile
00:00:04:43 - 00:00:28:03
The financial tab on the profile of your SwiftFox contact contains information on payments your contact is made, any subscriptions they have, or tickets they have purchased. In this lesson, we'll explain how to navigate the financial tab so you can have a complete view of all of your important payment information. To get started, let's bring up a user's profile.
00:00:28:07 - 00:00:53:41
Here you will see the financial tab. This tab will only be displayed if you have the SwiftFox Finance feature. First, you can see the payment sources of your contact, which could include that credit card information or direct debit details. Next is a snapshot of their payments to date, which could include payments year to date, the total amount paid during the life of their subscription, and any outstanding balance.
00:00:53:45 - 00:01:26:19
The subscriptions table is where you can see all of the details of your contact subscriptions. SwiftFox allows you to track multiple subscriptions on contacts. However, often you will only have one displayed here. The table shows the subscription type, the fee level, the method of payment, the subscription status, and when the subscription has been paid to. To change any details of the subscription, simply click the subscription name and in the draw that pops out you can change, pause, or cancel the subscription.
00:01:26:23 - 00:02:02:16
You can also add a new subscription to your contact by clicking Create Subscription and selecting a new plan. For further information on creating subscriptions for contacts, check out our Academy video on this topic in this current financial series. Below the subscriptions table, you will find information on all of your contacts transactions. This table shows the date of the financial transactions, the receipt number, how much the payment was for and how it was paid, whether the payment was successful and the user in your organisation that took the payment, if applicable.
00:02:02:20 - 00:02:28:49
Here you can also manually take a payment from your contact by clicking the make a Payment button. In this drawer you can select the type of payment being made. The value of the payment. Any additional details of the payment, the date the payment will be taken, and the method of the payment. If your organisation also handles ticketing for paid events, you will also see a ticketing table in the financial section of your contacts profile.
00:02:29:09 - 00:02:41:32
So there you have it. You now understand the financial tab on a contact profile. Be sure to check out all of our other videos in the finance series to get right across all of the financial features that SwiftFox has to offer.

ENB_PAL_MEM-06 Financial tab

016-05 Take a manual payment in SwiftFox
00:00:05:02 - 00:00:27:46
While most people make their regular payments online, sometimes people just want to pick up the phone and make a payment directly, or even visit your office and pay you in person with cash or cheque. In this lesson, we'll explain how to take manual payments, no matter how rare. So let's get started by bringing up a contact's profile. Here you will see the financial tab.
00:00:27:48 - 00:00:50:46
Now this tab will only be displayed if you have the SwiftFox Finance feature. Scroll down to the receipts table. Here you will see the full transaction history of your contact. To add a new payment to the receipts list, simply select make a payment. In the draw select the way you want the payment to be recorded and select the payment amount.
00:00:51:00 - 00:01:14:26
You can also add any comment about this payment if required. You can change the date this payment is recorded as being taken, which is often helpful for recording payments made at events held previously. A receipt number is automatically generated. However, you can also change this number if required. Now select the payment method that was used for the payment.
00:01:14:30 - 00:01:37:19
All payment methods are supported including cash, cheque, statement and credit card. If taking payment by credit card, you will need to first ensure the card is set up as a payment source. It will then appear on your list. Once you have selected your method, select submit and now your payment will appear in the transactions table. So there you have it.
00:01:37:23 - 00:01:51:01
You now understand how to take a manual payment from your contact in SwiftFox. Be sure to check out all of our other videos in the finance series. To get right across all of the financial features that SwiftFox has to offer.

016-06 Refund a payment in SwiftFox
00:00:04:41 - 00:00:28:01
Today we're going to show you how easy it is to refund payments to your contacts in SwiftFox. To get started, let's bring up a contacts profile. Here you will see the financial tab. Now this tab will only be displayed if you have the SwiftFox Finance feature. Scroll down to the receipts table. Here you will see the full transaction history of your contact.
00:00:28:05 - 00:00:52:49
This table shows you the date of the transaction, the receipt number, the payment amount, the method of payment, and the status of that transaction. If your transaction was initially successful, however, your contact has now requested a refund. You can do so in these easy steps. First, identify the transaction you wish to refund and make sure it was a success.
00:00:53:03 - 00:01:19:39
Now click on the receipt number. This will show you the transaction receipt and all of the relevant details. To refund the transaction, simply click the refund button. Some payment methods, including credit card and direct debit, can be refunded instantly through SwiftFox. Other payment methods such as cash or cheque will show an alert reminding you that you will need to send the refund manually.
00:01:19:43 - 00:01:42:13
The final step is to click confirm. Now you can see the transactions table has updated the status of the transaction to show it has been refunded. So there we go. That's how easy it is to give a refund to your contact in SwiftFox. Be sure to check out all of our other videos in the finance series to get right across all of the financial features that SwiftFox has to offer.

16-21 Add payment methods
00:00:04:10 - 00:00:16:10
You know what they say, money talks but in SwiftFox, it also processes and integrates with payment providers. Whether you prefer Stripe or a good old fashioned cheque we've got you covered.
00:00:16:14 - 00:00:25:43
In this lesson, we'll show you how to set up payment methods in SwiftFox including payment providers and manual payment options. Let's jump in.
00:00:25:47 - 00:00:43:40
First, let's navigate to the payment method settings. You’ll land on a table showing all your existing payment methods. If this is your first time setting up payment methods or you haven't previously had any configured by SwiftFox you will see a blank table. But don't worry, we're about to fill it with options.
00:00:44:00 - 00:01:16:04
Select Add payment method. You'll see a drawer open where you can create a new payment method. In the Payment Details section, you can select from a list of available methods, including payment providers such as Stripe, NAB Transact, E-way, Pay,Way, BPoint, or PayPal. As well as manual methods such as invoices, manual, credit card, cheque, or cash. Choose the method that works for your organisation. Remember, you can set up as many as you like.
00:01:16:14 - 00:01:50:14
Once you select a payment method, SwiftFox will pre-populate a provider label. For example, if you select Stripe the label will automatically display as Stripe. You can rename this to anything you'd like. This label will appear in your payment methods table and when you're processing payments within SwiftFox. So choose something that makes sense for your team. You'll see some additional options, including allow expired cards to be charged and automatically process payments in batches. These settings give you flexibility in how payments are processed.
00:01:50:18 - 00:02:13:37
Below the settings you'll see fields for provider specific credentials. These vary depending on which payment method you've selected. For Stripe you'll need a secret key and a publishable key, for NAB Transact you'll need merchant ID, environment and transaction password, for PayPal you'll need client ID, environment and secret key.
00:02:13:41 - 00:02:30:32
Fill out the required details for your chosen method. Then select create to save your new payment method. Once created, your payment method will appear in the table. You can see the method name and payment method type and you can edit the provider details if something changes.
00:02:30:36 - 00:02:51:17
Something to note is that you can't delete payment methods, but you can turn them off whenever needed. We recommend adding as many payment options as you'd like to offer. This typically includes at least one payment provider and any manual methods your organisation uses. The more options you provide, the more flexibility you'll have when processing payments.
00:02:51:21 - 00:03:06:37
And there you have it! Payment methods that actually talk your language. Whether you use digital providers or take a cheque SwiftFox has you sorted. Thanks for tuning in. Feel free to explore more lessons about SwiftFox Finance by checking out the SwiftFox Academy.
Invoicing & the Finance Action Centre
Masterclass: Invoices
00:00:04:06 - 00:00:17:17
Hey everyone, welcome back to another SwiftFox Masterclass. Today I'll be walking you through some significant improvements to how SwiftFox handles, invoicing, subscriptions and financial management. And there's a lot to be excited about here.
00:00:17:21 - 00:00:28:42
These changes are designed to give you more flexibility and control over your billing, whether you're managing memberships, donations, or any kind of recurring payments through SwiftFox. Let's get into it.
00:00:28:46 - 00:00:49:31
Here's the challenge a lot of our customers face. Your membership base doesn't all join on the same day. People sign up throughout the year. They upgrade their plan, they move between tiers, they go on hold, they come off hold and keeping billing clean, fair and transparent across all of that has traditionally required a lot of manual work or a lot of compromise.
00:00:49:35 - 00:01:15:41
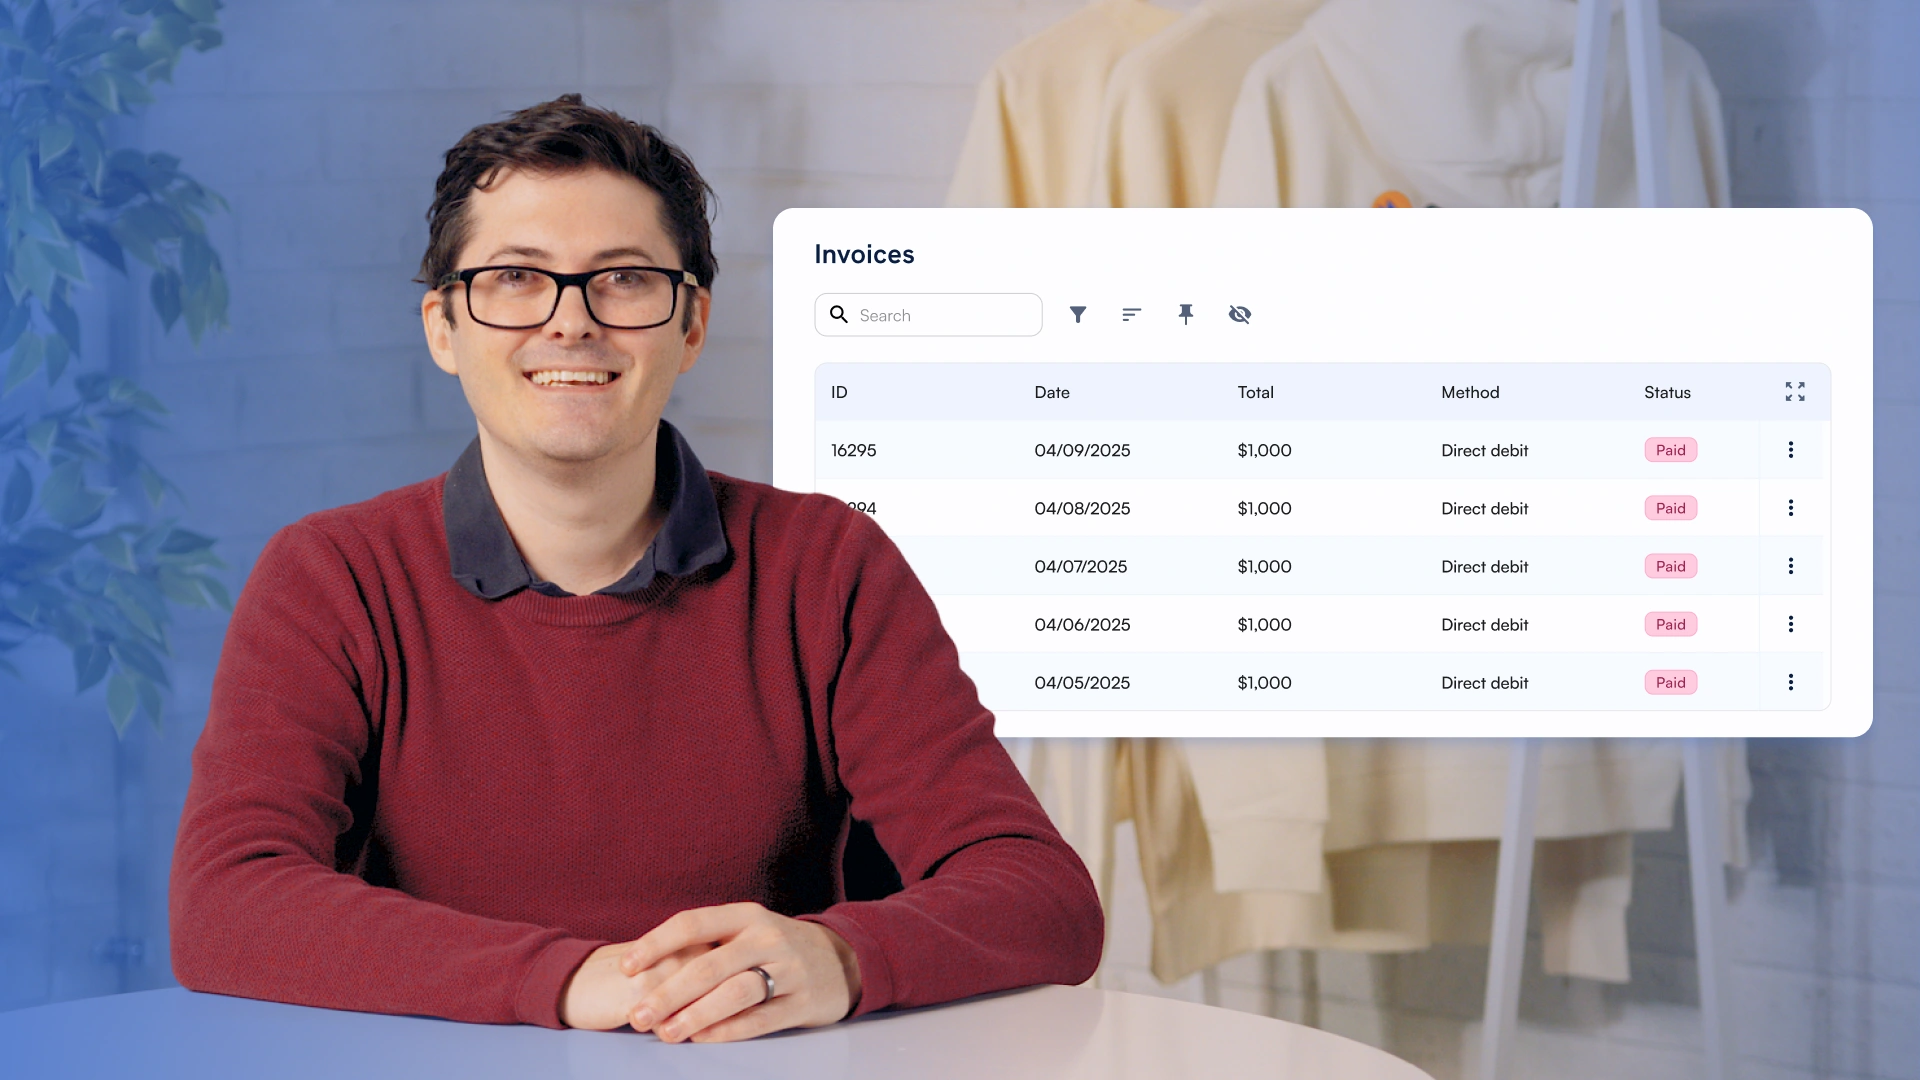
These latest changes to SwiftFox handle all of that complexity for you automatically. The big change here is how invoicing works in subscriptions. It's been completely revamped. Invoices now generate automatically for every subscription. Clearly outlining exactly what has been paid and what is due. These invoices contain line items with clear descriptions of the billing period. They cover quantities, unit prices, and totals.
00:01:15:45 - 00:01:39:33
When you sign up a new member or customer and add them to a subscription and invoices created automatically. For common period plans, this invoice represents the entire year and will slowly be paid off over time using their fortnightly, monthly and quarterly payments. For anniversary plans, one invoice will be generated for each period, be that weekly, fortnightly, quarterly or anything in between.
00:01:39:37 - 00:01:53:17
In all of these circumstances, you have full control over whether these invoices are emailed out to your members and customers. For those customers with a member portal, you even have the option of showing these invoices there for your customers to see anytime.
00:01:53:21 - 00:02:05:01
This invoice first model offers flexibility and oversight. When a subscription changes, say, and then the upgrades that apply mid-cycle, the system automatically handles the proration for you.
00:02:05:05 - 00:02:18:27
You'll see a clear credit and charge line item on the invoice for both you and the member to know exactly how the adjustment was calculated. It's completely transparent, and it builds trust with your members because they can see the numbers add up.
00:02:18:31 - 00:02:34:03
Your invoices also generate professional PDF tax invoices customisable with your organisation's details and branding. They can be set up for early invoice generation, so invoices go out ahead of billing date and your members always know what's coming.
00:02:34:07 - 00:02:57:18
Invoices status are cleared to paid, partially paid, and approved and awaiting payment. So you always know where things stand. These changes represent a long awaited step forward for financial management in SwiftFox. Whether you're running simple annual memberships or complex, multi-tiered subscription models with members joining and changing plans throughout the year, the platform now has the flexibility to handle it.
00:02:57:22 - 00:03:10:10
If you have any questions about these changes or want help getting your plans configured, reach out to a member of our support team through the support button in SwiftFox, or talk to your account manager directly. Thanks for joining us and we'll see you next time.

016-14 Send Invoice Emails
00:00:04:05 - 00:00:14:26
Hey there, invoice enthusiast. Ready to turn those payment collection headaches into smooth sailing? Well, let's dive into the wonderful world of SwiftFox invoicing.
00:00:14:30 - 00:00:29:22
In this lesson, we'll explore how to create, send, and manage invoices using the SwiftFox invoicing system. Your all-in-one solution that makes external platforms feel so last season. Let's make those invoices work for you.
00:00:29:26 - 00:00:38:13
We'll start by creating an invoice manually from a contact profile. Don't worry though. They can also appear through subscriptions and events.
00:00:38:17 - 00:00:58:19
Head to the financial tab on a person or organisation profile and under the invoice section, select Create Invoice. This will open a fresh new invoice. We can set the invoice date, due date, currency and reference if required.
00:00:58:23 - 00:01:13:24
Select Add a Line Item to start populating this invoice. You'll need to fill in these essential details. Description of the item or service, account, tax rate and preferences, and total amount payable.
00:01:13:28 - 00:01:39:06
Once you've got everything looking shipshape, you've got a couple options. Delete, if you've just completely changed your mind and that's okay, don't worry, it happens. Save as draft, for when you need a moment to double check those numbers. Approve an email, for when you're ready to make that rain. Approve without sending or submit for approval, if someone else needs to give the numbers the thumbs up.
00:01:39:10 - 00:02:05:49
When you select Approve and Email, SwiftFox springs into action, sending your perfectly crafted invoice straight to your contacts inbox. They'll receive a professional looking invoice. No clipart in sight. A secure pay now button that means business one click on that pay now button, and they'll be whisked away to a secure payment screen powered by your organisation's payment gateway.
00:02:06:03 - 00:02:22:12
They pop in their details, hit submit and boom! The payment is processed and the invoice status updates automatically in SwiftFox. They'll get a lovely confirmation email, and you'll get that wonderful feeling of a job well done, plus some money, which is also nice.
00:02:22:16 - 00:02:41:39
You can view and manage all your invoices through the Invoice Action Center. Here's what you can do. Filter by date range. Check invoice numbers, totals and payment statuses and view print or manually mark invoices as paid if needed. Keeping track of those outstanding invoices has never been easier.
00:02:42:00 - 00:03:01:27
SwiftFox’s versatile invoicing systems seamlessly integrate across multiple touch points in your workflow. Whether you're generating invoices directly from a contact's financial tab, automating them through the subscription workflows, processing event ticket sales, or handling any other payment collection needs.
00:03:01:31 - 00:03:13:30
Everything is centralised within SwiftFox. This integrated approach eliminates the need for complex workarounds or multiple systems, streamlining your entire invoicing process.
00:03:13:34 - 00:03:37:21
For organisations using Xero, SwiftFox offers seamless integration capabilities. This powerful connection allows you to automatically push invoices from SwiftFox to Xero, streamlining your invoice sending process, and maintaining perfect synchronisation between both systems. The integration ensures your financial records stay consistent and up to date across platforms.
00:03:37:25 - 00:03:46:34
However, if you don't use Xero there's no need to worry, SwiftFox is robust native invoicing system handles everything you need independently.
00:03:46:38 - 00:03:59:24
And there you have it! Invoice management that's fast, secure, and actually enjoyable to use. Who knew invoicing can be this much fun, hey? Thanks for watching. Now go forth and invoice with confidence.

016-17 Customise your invoice footer
00:00:04:06 - 00:00:16:23
Let's make your invoice for the sparkle. In this lesson, we'll show you how to jazz up your invoice footers with payment methods, personalised details, and messages that reflect your organisation's personality.
00:00:16:31 - 00:00:24:06
Think of it as giving your invoices a stylish pair of shoes. Let's dive in and make those invoices look fantastic.
00:00:24:10 - 00:00:37:01
Every invoice, in SwiftFox already includes your organisation's essential details from your company details, settings, your organisation name, address, logo, phone number, and ABN.
00:00:37:05 - 00:00:44:47
These details automatically appear at the top of your invoice, but you can add a custom footer section at the bottom of every invoice.
00:00:45:07 - 00:00:58:45
Let's explore how. First select Settings, then navigate to the Financial tab and open the Invoice Settings area. This is your creative canvas where you design what appears in your invoice footers.
00:00:58:49 - 00:01:09:24
You'll find a user friendly drag and drop editor that even a koala could use. Although we haven't tested this theory yet.... what?! I really think they could!
00:01:09:28 - 00:01:36:28
Anyway! To begin, select a rich text block, type in your heading or message. For example “Payment Methods”. Add your preferred payment details such as BPAY or bank transfer information. You can also create columns to display information side by side, perhaps payment instructions on one side and contact details on the other. Everything is customisable to match your style preferences.
00:01:36:39 - 00:01:59:49
Want to add a personal touch to your invoice footer? Well, you can do that with merge fields. To insert one, simply type the @ symbol. A list of available fields will appear pulled from both the person's profile and their organisation record. You can include things like member number, BPAY reference, custom fields that you've set up in SwiftFox.
00:02:00:03 - 00:02:26:33
This is particularly handy when you want your invoice footer to show unique information for each contact. Not every contact will have data for every merge field, so let's be clever and add a fallback message. To do this, select the merge field. Enter a fallback message like not available to display if that field is empty. This ensures your invoice footer always looks professional even when some data is playing hide and seek.
00:02:26:44 - 00:02:52:16
Now comes the creative part. Adding your personal style. SwiftFox offers several formatting options to make your invoice footer visually appealing and professional. You can incorporate dividers to separate sections, organize information with bullet points, and adjust headings and spacing to create a clean, readable layout. If you make any mistakes along the way, don't worry, the undo features got you covered.
00:02:52:26 - 00:03:06:47
Before finalising your design, take advantage of the preview feature to ensure everything looks exactly as intended. Once you're happy with your masterpiece, save the block and it will apply to all future invoices generated in SwiftFox.
00:03:07:01 - 00:03:22:07
And there you have it. You've just learned how to create invoice footers that are both professional and personality packed. Thanks for watching and remember, great invoices are like great stories. They deserve a beautiful ending. See you in the next lesson.

016-11 Invoices as a payment option on Forms
00:00:04:47 - 00:00:26:14
In this tutorial, we're going to show you how to set invoice as a payment option for your event tickets. This feature adds flexibility to your ticket purchases, especially for those organisations that need this option. Today, we'll walk you through the process of setting up invoice as a payment option for your event tickets. It's a game changer for event management.
00:00:26:18 - 00:00:51:03
If you're new to creating paid events, check out our Create Ticketed Events tutorial in the Swift Fox Academy. It's a great starting point. All right, let's get started. First, we'll head into the ticket step of our event. I have gotten the start here and already set up a few ticket categories. Now let's add a ticket. Scroll down until you see the financial Ticket Settings dropdown.
00:00:51:10 - 00:01:19:07
Now this is where the magic happens. In this section you can set the item code account and tax rate for your event ticket. And remember, each ticket can have its own unique codes. Pretty neat right? Next up we're heading to the RSVP page step. This is where we'll add invoice as a payment option. Since this is a ticketed event, we need to add the ticket block to our form.
00:01:19:11 - 00:01:41:16
Don't forget to select the tickets you want to make available because it's all about choices. Now for the crucial part. Adding a payment block in the payment settings you'll find invoicing. Now in here we'll select allow invoice as a payment method. It's that simple to open up a new payment avenue. Here's where you can get into the details.
00:01:41:20 - 00:02:09:20
Enter your invoice reference. Select the due date and if you're using any invoice providers like Xero, you can select those integrations here. SwiftFox does play well with others, and here's a pro-tip some users might want ticket purchases to set their own reference number, like a purchase order number. You can enable this by clicking this dropdown. It allows users to enter a number or code that will appear on the invoice.
00:02:09:23 - 00:02:16:47
Talk about customisation. Great job! You're all set to sell tickets via invoice using SwiftFox. Thanks for watching.

016-07 Understand the SwiftFox Finance Action Centre
00:00:04:47 - 00:00:33:05
Today we're going to walk you through the SwiftFox Finance Action Center. This is where you can see all your financial information in one place. Everything from approving or viewing new members, donors or subscribers, seeing upcoming transactions, listing failed payments and showing recent cancellations. The list of information displayed in the Finance Action Center is unlimited, and our team helps you get them up and running.
00:00:33:09 - 00:00:58:24
Today we'll take you through our most popular Action Center features. To get started, navigate to the Action Center. Here you can see all your various reports on the left hand side. The first key report is your full list of members, donors, or subscribers. In some cases, organizations will need greater control over who can become new members or subscribers to their organization.
00:00:58:28 - 00:01:22:25
To do this, SwiftFox is able to link a form such as a new member form to an Action Center table, where users can approve or reject new applications before making a decision on if someone is approved or rejected, you can select the eye on an entry's row to view their details. If you are happy for them to join, then select the checkbox next to their name.
00:01:22:29 - 00:01:53:32
Once you are happy with the list of people to approve, click approve selected, click confirm. Other key reports in the Action Center include the transactions or receipts report, which shows you a full list of all your transactions. You can filter this list so only shows you transactions from specific time periods. Or you can show them all. You can also view upcoming or pending payments categorised by payment type as well as any failed transactions.
00:01:53:36 - 00:02:15:15
The Action Center is also a great way to track your data health. You can see a list of contacts who have a missing address, missing email, or any other fields on a contact you wish to track. So in conclusion, the power of the Financial Action Center is that it can display any of the reports you find important to your organisation.
00:02:15:19 - 00:02:34:31
It is incredibly versatile and the data that appears is exportable. Simply chat to our team about new reports you would like to see in the Action Center, and they will work on getting them live. Be sure to check out all of our other videos in the finance course to get right across all of the financial features that SwiftFox has to offer.
Masterclass: Finance Action Centres
00:00:04:04 - 00:00:12:32
Hi everyone and welcome to this SwiftFox Masterclass. Today we're looking at Receipt and invoice action centres and specifically the columns that aren't showing when you open them.
00:00:12:32 - 00:00:23:10
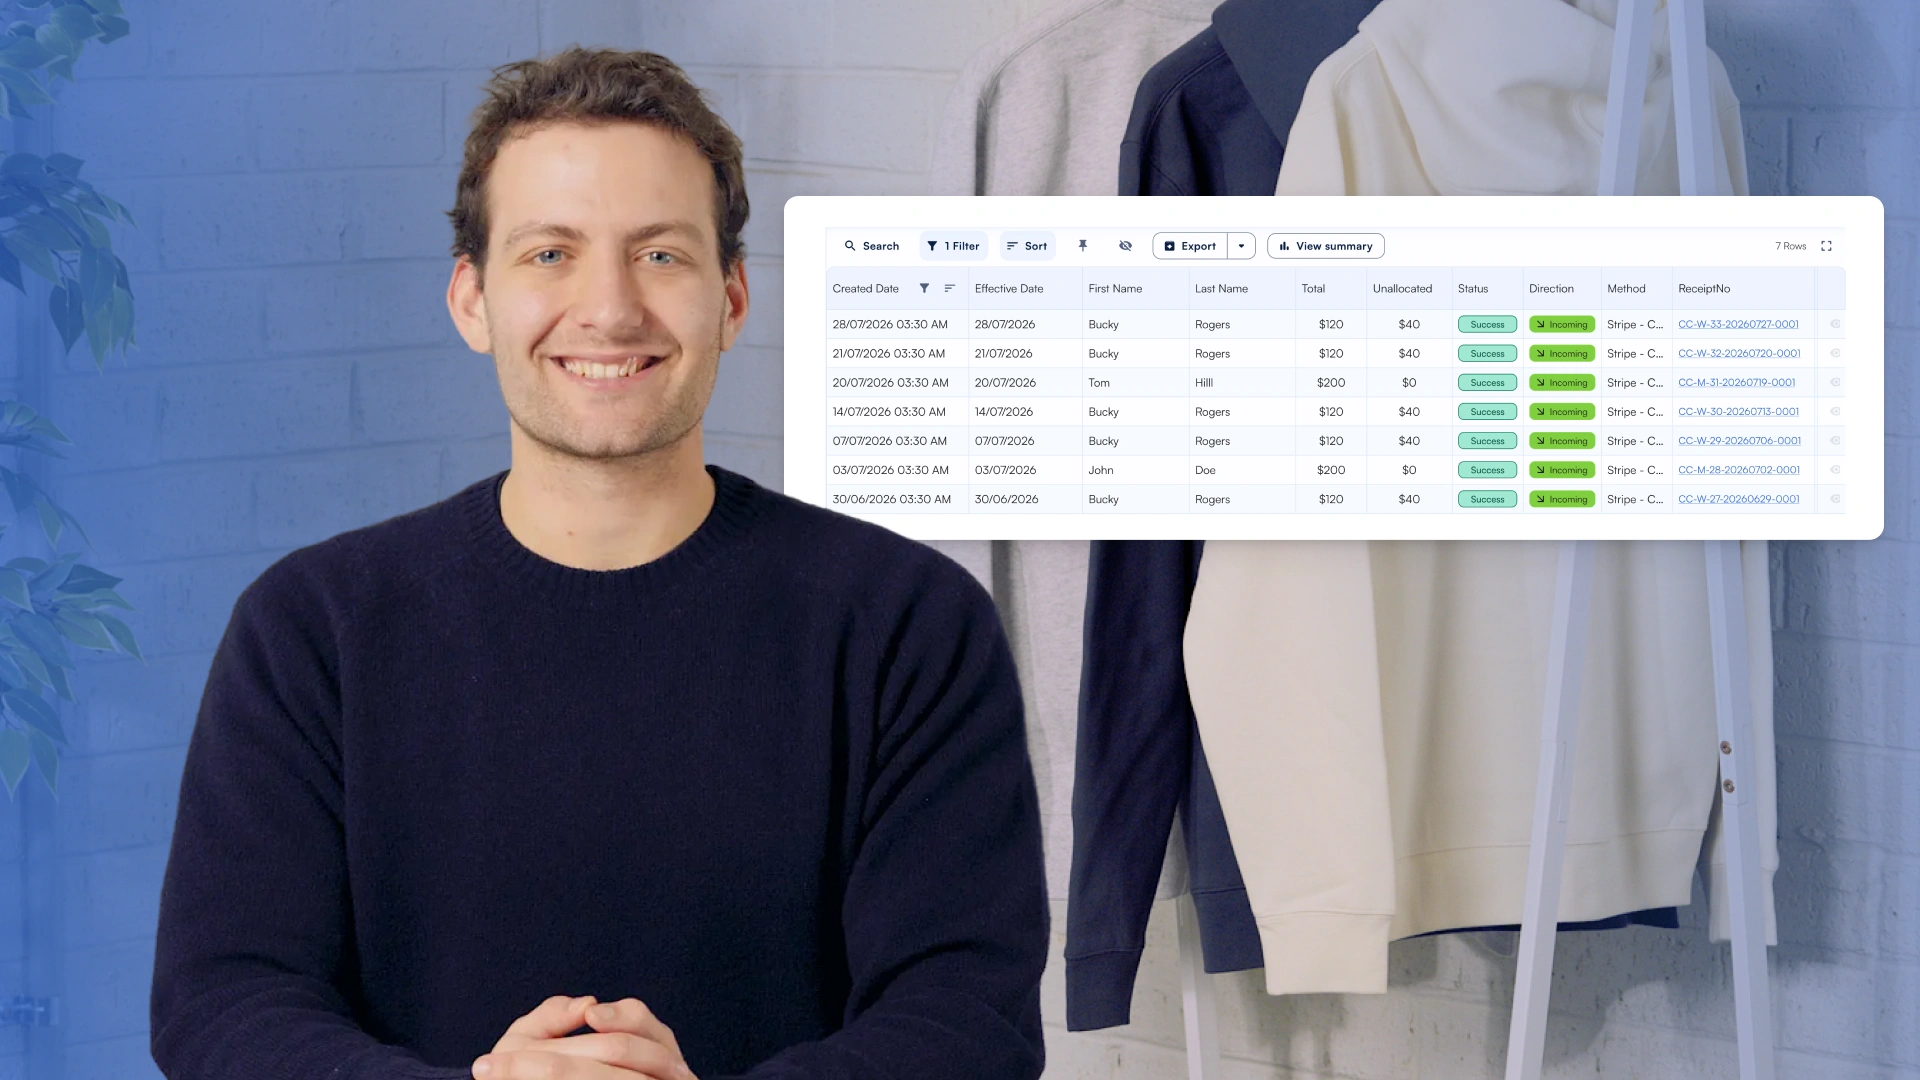
Every Action Center table has a column visibility control. The eye icon in the toolbar labeled Choose Columns to hide. That's where the new additions are currently sitting.
00:00:23:20 - 00:00:34:46
What matters now is that a new column doesn't add itself to a view you've already built. It arrives, switched off. The data behind them is being captured either way, it's your view that was configured before the column existed.
00:00:35:00 - 00:00:56:34
A receipt carries two dates, a Created date and an Effective date. Created date is when the record came into existence. Effective date is when the money actually moved. For gateway payments, these are usually the same day, so the distinction can feel academic until you're dealing with a backdated cash, a cheque banked late, or a payroll deduction run.
00:00:56:46 - 00:01:19:30
Unallocated is the portion of a receipt that hasn't yet been applied to an invoice. It's useful anywhere, but it most earns its keep on subscription invoices. When a payment hasn't been correctly applied to a subscription, the money is in the account, but it isn't attached to the right membership year – so the member's paid to date is wrong and they can show as unfinancial despite having paid.
00:01:19:34 - 00:01:30:38
Unallocated is the column that exposes that. Filter on it and you have a standing view of payments that haven't landed where they should, rather than discovering it one complaint at a time.
00:01:30:42 - 00:01:43:22
Line comments and invoice line comments lift details that previously required opening each receipt drawer up to the table level, where it can be sorted, filtered and exported alongside everything else.
00:01:43:34 - 00:02:09:06
On the invoice side, there are three worth noting. Tax is the GST or local equivalent totalled from the invoices line items. Invoice line comments does the same job as on receipts and Event – displays the linked event name whether an invoice arrives through a ticket which turns per event revenue reconciliation into a filter rather than an export, and a pivot table.
00:02:09:18 - 00:02:29:37
So to wrap up, these new columns won't automatically appear in views you've already built, switching them on turns on a partial view of your finances into a complete, defensible one. The simplest first step is your receipts action centre. Switch on effective date and unallocated and see what they tell you. Thank you for joining this masterclass and we'll see you in the next one.
The Xero Integration

016-08 Xero Integration
00:00:05:00 - 00:00:31:45
Welcome to today's tutorial. We’re a diving into the exciting world of integrating Xero with SwiftFox by connecting these two powerhouse platforms, you'll streamline your financial data and ensure your tax rates, accounts, and items are perfectly mapped. So ready to make your financial life a whole lot easier? Let's jump in. First stop SwiftFox settings, select Xero integration.
00:00:31:49 - 00:01:01:28
Now let's select Connect your organisation. This will whisk you away to zero where you choose which organization to connect. If you're a one-organisation-wonder SwiftFox will automatically connect for you. How's that for efficiency? Select allow access and you'll return back to SwiftFox with your organisation now connected. Here comes the crucial bit. Configuring your tax rates, accounts, and items.
00:01:01:32 - 00:01:24:17
This is an essential step in your Xero integration. Without it, your data workflow smoothly between the two platforms. So let's break it down. We'll start with tax rates. We'll start with tax rates mapping where we can configure our tax rates. SwiftFox starts with three default rates, which you can then map to the corresponding tax rates in your Xero.
00:01:24:21 - 00:01:51:15
You can also create new rates from the top dropdown. Next, let's map accounts. Again on the left hand side is the accounts as they appear in SwiftFox. While on the right you can map to the correspond accounts in Xero and finally items mapping. This allows you to map your SwiftFox items to Xero, such as event tickets and transactions, and how you wish them to be categorised in Xero.
00:01:51:15 - 00:02:13:18
On the left hand side, you have your SwiftFox item, and on the right hand side you can map them to the corresponding item in Xero. Pro-tip: Often create new items in Xero? No worries, they won't automatically appear in SwiftFox, but a quick click on sync items from Xero will bring them over, ready for selection.
00:02:13:22 - 00:02:35:26
And there you have it. You have successfully connected to Xero and mapped your tax rates, accounts and items in SwiftFox. This setup ensures that your transactions flow as smoothly as a well-oiled machine between SwiftFox and Xero. Keeping your data accurate and organised. Thanks for tuning in. Now go forth and conquer those finances.

016-12 Sync contacts between Swiftfox and Xero
00:00:04:44 - 00:00:27:12
Let's show you how to sync your contacts between Xero and SwiftFox. Once your account is integrated with SwiftFox, you can easily create and update contacts in zero and have them automatically sync into SwiftFox. First, ensure Xero is integrated with SwiftFox. You can learn how to do this by watching our Academy video link Xero to SwiftFox.
00:00:27:16 - 00:00:54:45
Once we're all synced up, let's head in to Xero and start creating contacts. Let's begin by creating a new business, Smith Corporation. Next, we'll create a primary person for Smith Corporation, Lillian Smith, and we'll give her an email address. We can add various contact details such as phone number, mobile number, website, ABN billing address, and delivery address. Now let's save our details.
00:00:55:02 - 00:01:21:33
We can immediately see them appear here in Xero. Time to head over to SwiftFox. After a brief wait to allow for syncing, let's search for Smith Corporation in Swift Search. Here's Smith Corporation automatically created, and we can see that Lillian Smith has been attached to this organisation as its primary contact. Heading into Lillian's profile, we can see that her email address has been linked correctly.
00:01:21:37 - 00:01:39:18
And there you have it. You've just sent your Xero contacts into SwiftFox. Quick and easy and oh so satisfying. Now your contact details can live in perfect harmony across both platforms. Making your CRM and accounting feel like a dream team. Thanks so much for watching.

016-09 Xero invoices in SwiftFox
00:00:04:44 - 00:00:27:12
Are you ready to see how easy it is to create an invoice in Xero and watch it magically appear in SwiftFox? Well, with this seamless integration, managing your invoices and keeping your financial records in sync has never been easier. Let's dive in and get those invoices rolling. First things first. Ensure your Xero is integrated with Swift Fox.
00:00:27:24 - 00:00:51:08
Now, if you haven't done this yet, check out our Academy video link zero to SwiftFox for a step by step guide. Now let's kick off in Xero and create a new invoice. For this tutorial, we'll create an invoice in Xero for Smith Corporation, setting the due date for seven days from now. Here are some key steps you can follow.
00:00:51:12 - 00:01:15:17
Give your invoice a unique reference. Select the appropriate item or service. Input the quantity and once you're happy with the details, click save and close, and voila! You've just created a new invoice in Xero. You can see it right here. After saving. Now let's give the sync a minute to work its magic and then we'll head back into SwiftFox.
00:01:15:21 - 00:01:41:37
For this example, I'll start by using Swift Search to look up Smith Corporation and bring up its profile. Navigate to the financial tab and scroll down to the invoices section. Here's where you'll see your recently created Xero invoice, which now appears in SwiftFox. How's that for seamless integration? If you click on the three dot menu, you'll have options to either view the full invoice or edit any of its details.
00:01:41:41 - 00:01:58:04
And there you have it. You've just witnessed how effortlessly Xero invoices sync with SwiftFox. With your invoices accessible in both systems, you can swiftly review, edit, or manage them within SwiftFox. Thanks so much for tuning in and happy invoicing!

016-10 Send SwiftFox invoices to Xero
00:00:04:41 - 00:00:27:45
Today we'll walk you through how to create an invoice directly in SwiftFox and have it automatically sync to Xero. This integration is a game changer for managing your finances efficiently. So let's dive in. Firstly, make sure your Xero is integrated with SwiftFox. If you're not sure how to do this, check out our Academy video link Xero to SwiftFox.
00:00:27:49 - 00:00:52:36
It's a quick watch and will set you up for success. Now let's create a new organisation in SwiftFox. Don't worry if it's not in your Xero yet. We'll manage that later in this new organisation. Head over to the financial tab and scroll down to the invoices section. Select Create New Invoice to get this started. You'll notice several key details are pre-filled that's efficient!
00:00:52:40 - 00:01:18:13
However, make sure you click the Xero Integration checkbox. It's small, but it's mighty. Time to add some substance to your invoice. Select Add Row to insert a new line item. Select the item and fill out the remaining columns in the line item. Happy with how it's looking? Great! Select save and close. But wait. There's more. Remember how I mentioned we'd handled the Xero magic?
00:01:18:22 - 00:01:41:21
Well, here it comes. A warning will pop up letting you know that this organisation doesn't currently exist in Xero. But no worries, it will be created automatically. Just click confirm and watch the integration work its wonders. Now let's hop over to zero and look up our newly created organisation. And there it is. Your invoice has made the journey from SwiftFox to Xero.
00:01:41:23 - 00:02:02:46
Safe and sound. Here's the best part. You can edit the invoice in SwiftFox any time and the details will automatically update in Xero. It's like having a personal assistant who never sleeps. And there you have it folks. You've just learned how to create an invoice in SwiftFox and seamlessly sync it with Xero, even for brand new organisations.
00:02:03:00 - 00:02:13:05
This integration is your ticket to hassle free invoicing and perfectly sync accounting records. Thanks for joining us on this adventure. Now go forth an invoice like a pro.

016-13 Xero tracking codes
00:00:05:17 - 00:00:20:20
Discover how Xero tracking codes in SwiftFox can revolutionise your financial organisation. In this guide, we'll show you how this powerful feature helps you categorise, monitor, and analyse your data with precision.
00:00:20:24 - 00:00:42:12
So what are tracking categories? Tracking categories in Xero allow you to monitor specific aspects of your business, making them especially valuable for; associations managing different event types, membership organisations tracking various activities, or event managers, categorising revenue streams.
00:00:42:16 - 00:00:55:19
To set up tracking categories in Xero. Access your settings and navigate to Xero Integration. From there, you'll find your connected organisations, which you can expand by clicking Settings.
00:00:55:23 - 00:01:09:08
In here you then find Tracking Categories where you can configure your categories. Xero only allows two active tracking categories at a time, commonly used for tracking events and job codes.
00:01:09:11 - 00:01:24:15
Selecting sync tracking categories from Xero will load your Xero categories into SwiftFox. If these don't already exist as tracking categories in SwiftFox you can select them from this dropdown and then select create to track them.
00:01:24:19 - 00:01:33:34
We can see our categories in Xero are now mapped to our categories in SwiftFox and expanding this we can see the related tracking codes have also been mapped.
00:01:33:43 - 00:01:46:01
If there are any additional codes in Xero that don't yet have a matching code in SwiftFox, then you'll see this dropdown here, which gives you the option to instantly create and map those codes.
00:01:46:05 - 00:01:56:24
We can see by this tick that all of our categories and codes are now correctly mapped. Once your tracking categories are configured in Xero and SwiftFox, you can apply them in two ways.
00:01:56:36 - 00:02:14:47
First, find them under Financial Ticket settings when creating event tickets. Second, use the dropdown menu in invoice rows when creating invoices to assign tracking codes. This enhanced system helps you analyse your events and track costs more efficiently.
00:02:15:01 - 00:02:28:37
Xero tracking codes are your key to unlocking powerful financial organisation. With the seamless integration between Xero and SwiftFox, you can now track and analyse your financial data with precision and ease.
00:02:28:41 - 00:02:36:00
Thanks for joining us! To discover more ways SwiftFox can streamline your operations. Check out our other finance lessons.
Reporting & Reconciliation
.webp)
16-20 Tracking categories in SwiftFox
00:00:04:16 - 00:00:14:19
Tracking categories and tracking codes, they're the unsung heroes of organised invoicing. If spreadsheets had a fan club, these would be the VIP members.
00:00:14:23 - 00:00:30:29
In this lesson, we're going to show you how to set up tracking categories and tracking codes in SwiftFox. These are native tracking codes that work separately to Xero, but they'll also work beautifully alongside any codes you've sent through Xero.
00:00:30:33 - 00:00:44:07
This is especially useful if you're using native invoicing in SwiftFox without Xero, or if you want to set up additional codes that don't exist in Xero for SwiftFox specific invoicing. So let's jump in.
00:00:44:11 - 00:00:55:43
Here we are in settings on the Tracking categories page under financial in the settings menu. You will see a table here displaying your tracking categories and their tracking codes.
00:00:55:47 - 00:01:19:42
If you haven't set up any yet, you'll see an empty table ready for you to start building. On the right, you'll see the Add category button. Select that to begin adding your categories and codes. A drawer will appear next to create a new tracking category. Give this category a name that matches how you want to group and report on invoices something like department, location or program.
00:01:19:46 - 00:01:44:35
Underneath the new category name, you'll see an empty table and a field to create codes that exist within this category. For example, if your category is department, your codes might be admin, operations and sales. If your category is location, the codes might be Sydney, Melbourne and Brisbane. Type in your code name and you'll get a tick to confirm it's not already being used.
00:01:44:39 - 00:02:04:33
Select create and you'll see it added to the table. In this table you can rename your codes or toggle them on and off. You can add as many codes as you want here. Keep it minimal to start or build out a full list. If your team already has set codes it uses. Once you're happy with your codes, select Save.
00:02:04:37 - 00:02:18:42
Your new category will now appear in the main table with all your tracking codes listed beside it. At any point, you can select the row or the edit pencil icon to rename the category or add an update any codes within it.
00:02:18:46 - 00:02:47:35
Now this is important to remember. You cannot delete categories or codes because doing so could affect past invoices. However, you can disable them so they no longer appear in your active lists, while still maintaining the historical record on invoices that they were previously assigned to. The same goes for categories. You can toggle them off to archive them, but you cannot delete them entirely, as this would cause issues with historical invoices.
00:02:47:39 - 00:03:05:35
And there you have it, tracking categories and codes. Once you set them up, they'll quietly organize your invoicing world whilst you get on with more exciting things. Thanks for tuning in. If tracking categories turn out to be as thrilling as spreadsheets promised, you know where to find us for more lessons.
Masterclass: Financial summary custom field
00:00:04:16 - 00:00:16:31
Hi everyone and welcome to this SwiftFox Masterclass. In this session we're going to look at financial summary custom fields - what they are, why you should use them, and how to set them up in a way that actually delivers value day to day.
00:00:16:35 - 00:00:27:00
Financial Summary fields let you surface meaningful financial insights directly on a contact or organisation record, without needing to run reports, export data, or jump between screens.
00:00:27:04 - 00:00:39:30
At their core, financial summary fields are calculated fields. Instead of storing a value that someone has to maintain manually, they automatically calculate totals or counts based on successful receipts linked to a person or organisation.
00:00:39:40 - 00:00:55:37
This is especially useful when you want quick answers to questions like how much has this member paid this financial year? Or how much has this donor donated this financial year? What’s the total value of subscriptions linked to this contact? rather than digging through a financial tab, the answer is right there on the profile.
00:00:55:41 - 00:01:08:40
Let's look at a few practical examples. A very common one is year to day payments. You can create a field that shows total payments - current financial year, and it updates automatically as payments come in.
00:01:08:43 - 00:01:18:30
Another example is payment behaviour. Using a count based summary, you can see how many payments a contact is made, which can be just as useful as a dollar value.
00:01:18:34 - 00:01:31:17
Subscriptions are another big one. You might want to separate subscription income from one-off payments, or track how many subscription renewals have occurred in a given year. These fields let you tell the insight to the question you're actually trying to answer.
00:01:31:25 - 00:01:40:31
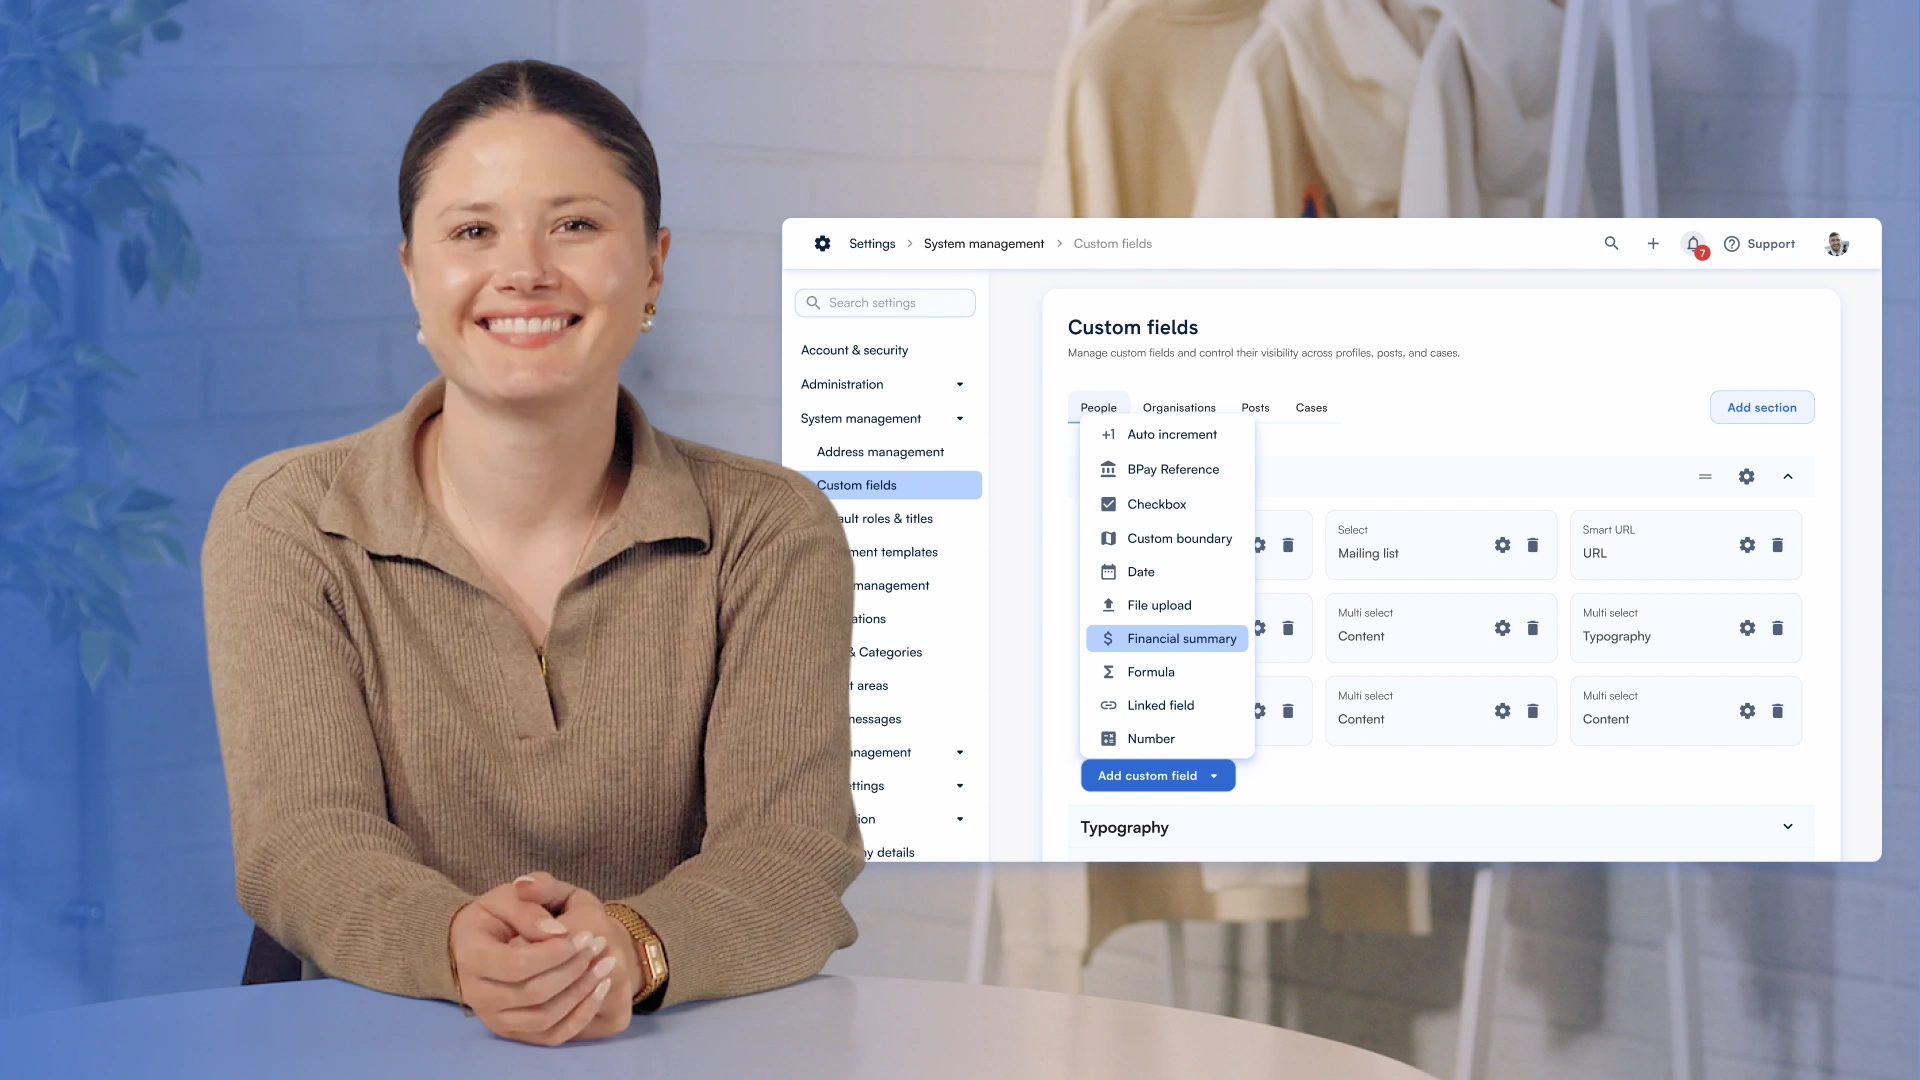
To create a financial summary field, head to settings. Then under System Management, select Custom Fields. This is where all custom fields are managed across SwiftFox.
00:01:40:35 - 00:01:56:41
From here, select a section and then add fields. Select a financial summary. When creating the field, you'll want to make two key choices. First, give the field a clear label, something like “Total payments - Current financial year”.
00:01:56:45 - 00:02:05:43
Second, choose the summary type: Total, if you want to add up dollar amounts. Count, if you want to count how many receipts match.
00:02:05:47 - 00:02:17:29
That choice defines whether you're measuring value or activity. Filters are where financial summary fields really become powerful. They let you control exactly which financial records are included in the calculation.
00:02:17:33 - 00:02:39:23
One of the most useful tools here is quick filters, which let you easily select Current financial year or Previous financial year. These automatically roll over as time moves on, so you don't need to update anything manually. You can also filter by line type, which lets you include or exclude things like payments, subscriptions, tickets, discounts or adjustments.
00:02:39:27 - 00:02:57:29
For example, you might create a summary that shows a total value of event tickets purchased in the current financial year where a line type is tickets. That gives you a clean, precise figure for ticket revenue. The real benefit of financial summary fields is that they bring financial context closer to everyday work.
00:02:57:33 - 00:03:23:41
Instead of relying on reports, your team can see key financial information at a glance, make better decisions during conversations, and quickly understand the contact organisation's financial history. Because these are custom fields that can also be used in list builder searches. automations, dashboards, action centres, communication merge fields, and list and reporting experts. So the insights flow all throughout the system.
00:03:23:45 - 00:03:47:26
So that's financial summary custom fields in SwiftFox. They give you accurate automatically updated financial insights right where you need them. If you're looking for a simple place to start, try creating Total payments - Current financial year or Payment count - Current financial year. These two alone unlock a lot of value very quickly. Thanks for joining this free Fox masterclass and we'll see you in the next one.
Masterclass: Receipt automations
00:00:04:16 - 00:00:18:03
Hi everyone and welcome to this SwiftFox Masterclass. In this session we're going to look at receipt automations, specifically how you can trigger automations when a receipt is created, and use receipt owner merge fields to personalise your communications automatically.
00:00:18:07 - 00:00:33:20
This is one of those features that quietly unlocks a lot of power and lets you respond differently to successful and failed receipts, tailor your messaging based on payment details, and personalise emails using the contact linked to the receipt all without manual follow up.
00:00:33:23 - 00:00:51:41
At a high level receipt automations allows SwiftFox to react the moment a receipt is generated, instead of someone needing to check payment statuses or send emails manually SwiftFox can detect whether our state was successful or failed, evaluate details inside the receipt and automatically trigger the right actions.
00:00:51:45 - 00:01:00:29
This is particularly useful for things like failed payment follow ups, successful payment confirmations and donation acknowledgments, and internal finance notifications.
00:01:00:33 - 00:01:14:26
You can also create different workflows depending on how payment was made. The important shift here is that payment workflows become automatic rather than reactive. So you're not chasing receipts, SwiftFox is responding to them on your behalf.
00:01:14:30 - 00:01:26:14
Every receipt in SwiftFox is linked to a person receipt owner merge fields lets you pull information from that person, specifically their name, email address and mobile number directly into your automation actions.
00:01:26:18 - 00:01:47:26
This means your automations aren't generic. They are personalised, accurate, and tied to the actual person who made the payment. You don't need to guess who to contact or hard code addresses. SwiftFox handles it dynamically. When an automation runs, the system automatically resolves the correct contact details from the receipt and uses them in your email, SMS or other actions.
00:01:47:30 - 00:02:15:00
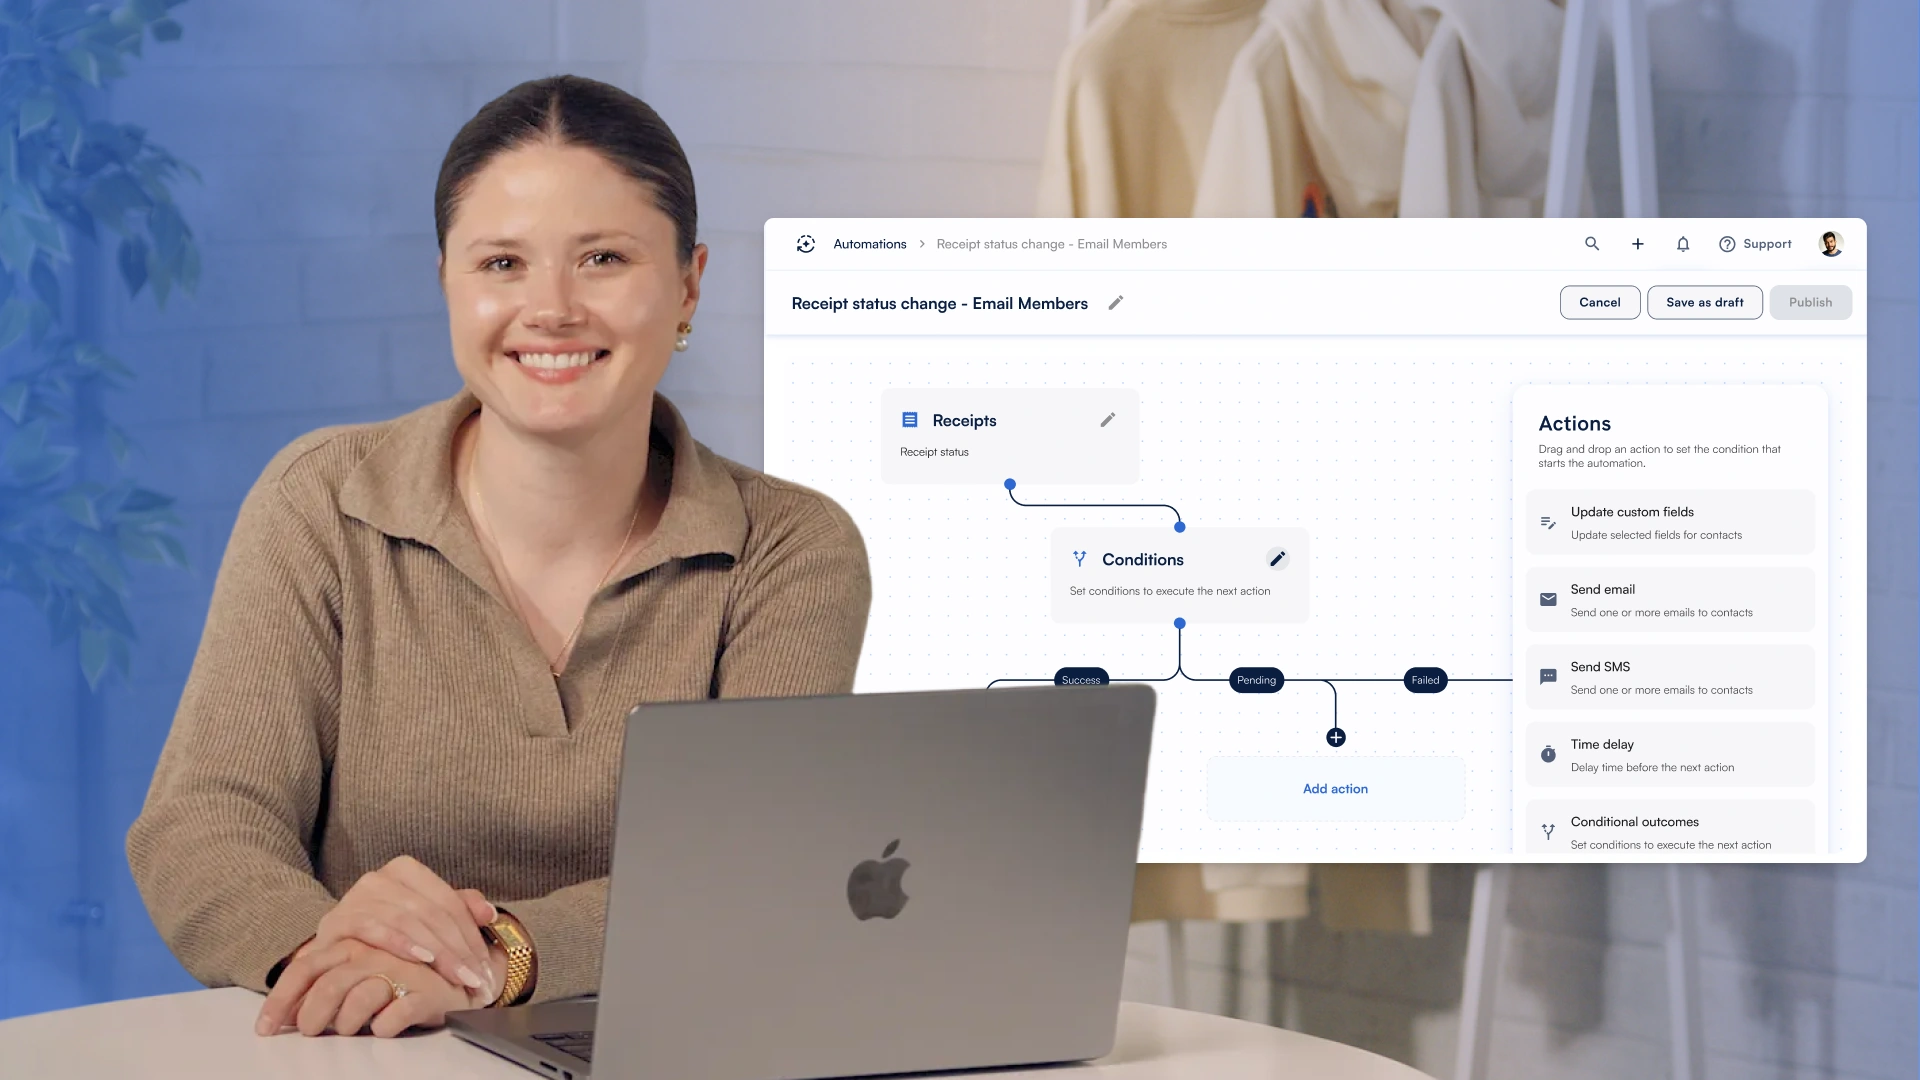
To get started, head to Automations and create an automation. When you select the receipt trigger, SwiftFox lets you know that a conditional outcome step will be added automatically. Once you confirm your automation is created with a receipt trigger at the top, followed by a conditional outcome block with two default branches success and failed. This structure gives you an immediate way to separate what happens when a payment succeeds versus when it doesn't.
00:02:15:04 - 00:02:42:00
You can build out each branch independently based on the outcome you're handling. Although the branches are labeled success and failed, you're not locked into these definitions. If you open the conditional outcome settings, you can fully customise what each branch checks for. You can build conditions based on receipt data, such as receipt status, payment method, line type, subscription category, line comments, or total receipt amount.
00:02:42:04 - 00:03:06:26
This means you can do much more than just success versus failure. For example, you might route receipts using a specific payment gateway down a different path. Trigger actions only when line comments contain a certain word. Handle large payments differently to small ones, or customise flows for different types of subscriptions or donations. So if Fox evaluates the receipt against your conditions and sends it down the appropriate branch automatically.
00:03:06:30 - 00:03:26:00
This gives you the flexibility to design workflows that reflect the complexity of your actual financial operations. Let's look at one of the most common actions sending an email. If you add an email action to a branch, for example, the success branch, the first thing you'll choose is the recipient. Under the receipt options, you'll see a target email address.
00:03:26:00 - 00:03:46:37
This is the email address of the person linked to the receipt. This is the key receipt owner merge field. It ensures the email always goes to the correct contact, even if the automation runs for hundreds or thousands of receipts. You're not manually entering addresses on building static recipient lists. You're telling SwiftFox to use the person already associated with the payment.
00:03:46:41 - 00:04:14:16
Inside the email body you can insert receipt specific merge fields by typing the @ symbol. These include things like the receipt, owner's name, email address, and mobile number, as well as receipt data like the amount, receipt status, and line comments. For example, you might include lines like “We've sent this confirmation to @ target email address, or if we need to reach you, we'll use @ target mobile number”.
00:04:14:20 - 00:04:38:37
When the automation runs, SwiftFox replaces those placeholders with real data from the receipt and a linked contact. This means every email is personalised and contextually accurate without you needing to manage the data manually. The real value of receipt automations is that they let you build finance workflows that run themselves, instead of manually checking failed payments, sending one off follow ups, or crafting generic receipt emails.
00:04:38:41 - 00:05:05:34
You can create workflows that respond instantly, are personalised to the contact, and adapt based on receipt details. Once published, every new receipt is automatically evaluated and handled. The same way consistently and reliably. This reduces admin work, eliminates delays, and ensures that your contacts receive timely, relevant communication based on the actual payment activity. So that's Receipt Automations and Receipt Owner merge fields in SwiftFox.
00:05:05:38 - 00:05:26:05
They give you a flexible, automated way to respond to payment activity, personalise communications, and reduce manual finance and admin work. If you're looking for a simple place to start, create a receipt automation. Add an email to the success branch. Use the target email address merge field as the recipient and include one end two receipt owner merge fields in the message.
00:05:26:09 - 00:05:34:07
That alone will give you a much more polished automated receipt experience. Thanks for joining this for SwiftFox Master class and we'll see you in the next one.

023-01 Mastering List Builder
00:00:04:22 - 00:00:28:46
Here's a riddle, what can organize your contacts? Power your events? Be behind every email? And make your life easier? The list builder! The backstage champion of all your SwiftFox communication tools. Your personal data organising super her! Too dramatic? Well, maybe I'm just passionate about list building. Let's dive in.
00:00:29:00 - 00:00:38:23
Navigate to Lists in the feature menu. When you arrive at the Lists landing page, you'll find a comprehensive table showing your saved lists.
00:00:38:27 - 00:00:57:45
This table includes essential information such as the list name, its record type, people or organisations, list type, live or fixed creation details, and the current number of results. This organised view helps you quickly locate and manage your existing lists.
00:00:57:49 - 00:01:21:14
To build a new list, select Create List. Let's start with the basics. When creating a new list, you'll need to give it a name and select your record type. This determines whether you're working with people or organisations. For this example, we want to look at individual people. These fundamental choices will shape how your list functions and updates over time.
00:01:21:18 - 00:01:37:18
Live lists are like magic. They update automatically when someone new meets your criteria. Fixed lists are more like a snapshot in time, perfect for when you want to send a campaign or create an invite list based on today's results.
00:01:37:22 - 00:01:50:07
Select next to begin building your search. This is where the real fun begins. The conditions here. You tell us SwiftFox exactly who you want in your list, but also who you don't want.
00:01:50:11 - 00:02:09:47
Start by adding a new rule. Think of a rule as a collection of filters like status is active or has attended an event. You can keep adding more filters to that rule and choose if they should all apply. That's an “and” search or if just one needs to match that's in “or” search.
00:02:10:01 - 00:02:23:47
For example, you might want people whose category is member or prospect. That would be an “or” search. Or you might want people who are both in a certain industry and speak a certain language, that's an “and” search.
00:02:24:01 - 00:02:48:27
I want to build a list of my members who have attended an event to send them a feedback survey. So we want our first row to say where, category type, includes, member. Then we can add another criteria saying where, RSVP status, include, attended. After completing your first rule, you can add additional rules to create more sophisticated searches.
00:02:48:31 - 00:03:19:13
Our last event had some guests from the Association for Lawyers who also attended, but they aren't all members and I'm keen to hear their thoughts too. Under the first rule, they would be excluded. So let's add a new rule with some conditions where, organisation, includes, Association for Lawyers, and event name, includes, mid year industry seminar. Now set the rules to work as “or” so that either of these are true they will be included.
00:03:19:17 - 00:03:37:46
These can go very complex if you want them to. You can search by almost anything in the system, including custom fields, posts and tags, stakeholder leader, organiser, connections. forms, survey and petitions, subscriptions and payments and events.
00:03:38:00 - 00:04:01:15
When you're happy with your set up, select next to view the results. Ta-Da! The results table appears showing everyone who matched your criteria. Here you can modify your view by showing or hiding columns, sorting and filtering the results, and doing a quick review to ensure the list contains the right contacts. Select next again to move to the action screen.
00:04:01:19 - 00:04:20:41
Now comes the most powerful part, taking action on your list. Once you've built your perfect list SwiftFox offers numerous ways to put it to work. You can save it as a fixed list, add or remove this list from other lists, and export your data to CSV format for external use.
00:04:20:45 - 00:04:44:17
Need to communicate with your contacts? Create personalised mail merges or update custom fields in bulk. You can also use the list to launch email campaigns, SMS messages, events, or call campaigns. These versatile options make your list not just an organisational tool, but powerful catalysts for engagement and communication.
00:04:44:21 - 00:04:53:47
Not ready to take action? Well, no worries, just select, save and close. Your list will be waiting for you when you need it and always remain up to date.
00:04:54:01 - 00:05:05:12
And there you have it. You're now a certified List Building champion. Thanks for watching. For more SwiftFox wizardry, check out our other videos. Until next time, keep those lists organised.